by Cheesemonger Carolyn

adapted from Deb Perelman’s “Even More Perfect Apple Pie”
with crust help from Kate McDermott’s book Art of the Pie
Apples and cheeses...a pairing so scrumptious that Joni Mitchell even name-dropped it in a song (“Conversation” on Ladies of the Canyon, if you’re curious.) These snacktime pals meet once more in a tasty twist on a Thanksgiving dessert table classic. Aged cheddar—your choice of Chandoka/Goat Milk or Great Grand—is grated into a handmade butter crust for the perfect complement to a thick layer of sweet, spiced apples. Finish it off with either a savory-sweet crumble topping or an easier-than-it-looks lattice crust, then enjoy after turkey dinner...or for breakfast the next day!
INGREDIENTS
For the crust: (this makes a single crust; for a lattice top, double the following amounts)
• 1 1/4 cup (182 g) all-purpose flour
• 1/4 tsp kosher salt
• 2 oz Great Grand Cheddar or Chandoka/Goat Milk Cheddar, finely grated
• 4 tbsp cold unsalted butter
• 3-4 tbsp ice cold water
• 1 egg (for egg wash over the lattice; not needed for crumble top pie)
For the filling:
• About 4 1/2 lbs apples
• 1/2 cup light brown sugar
• 1/2 cup all-purpose flour
• 1/2 tsp kosher salt
• 1 tsp cinnamon
• 1/4 tsp ginger
• 2 tbsp lemon juice
For the crumble topping, if making:
• 4 tbsp unsalted butter
• 1 cup rolled oats
• 1/2 cup light brown sugar
• 1/2 cup all-purpose flour
• 1/4 tsp kosher salt
• 1/4 tsp ginger
• 2 oz Great Grand Cheddar or Chandoka/Goat Milk Cheddar, finely grated

PROCEDURE
Prep the Crust:
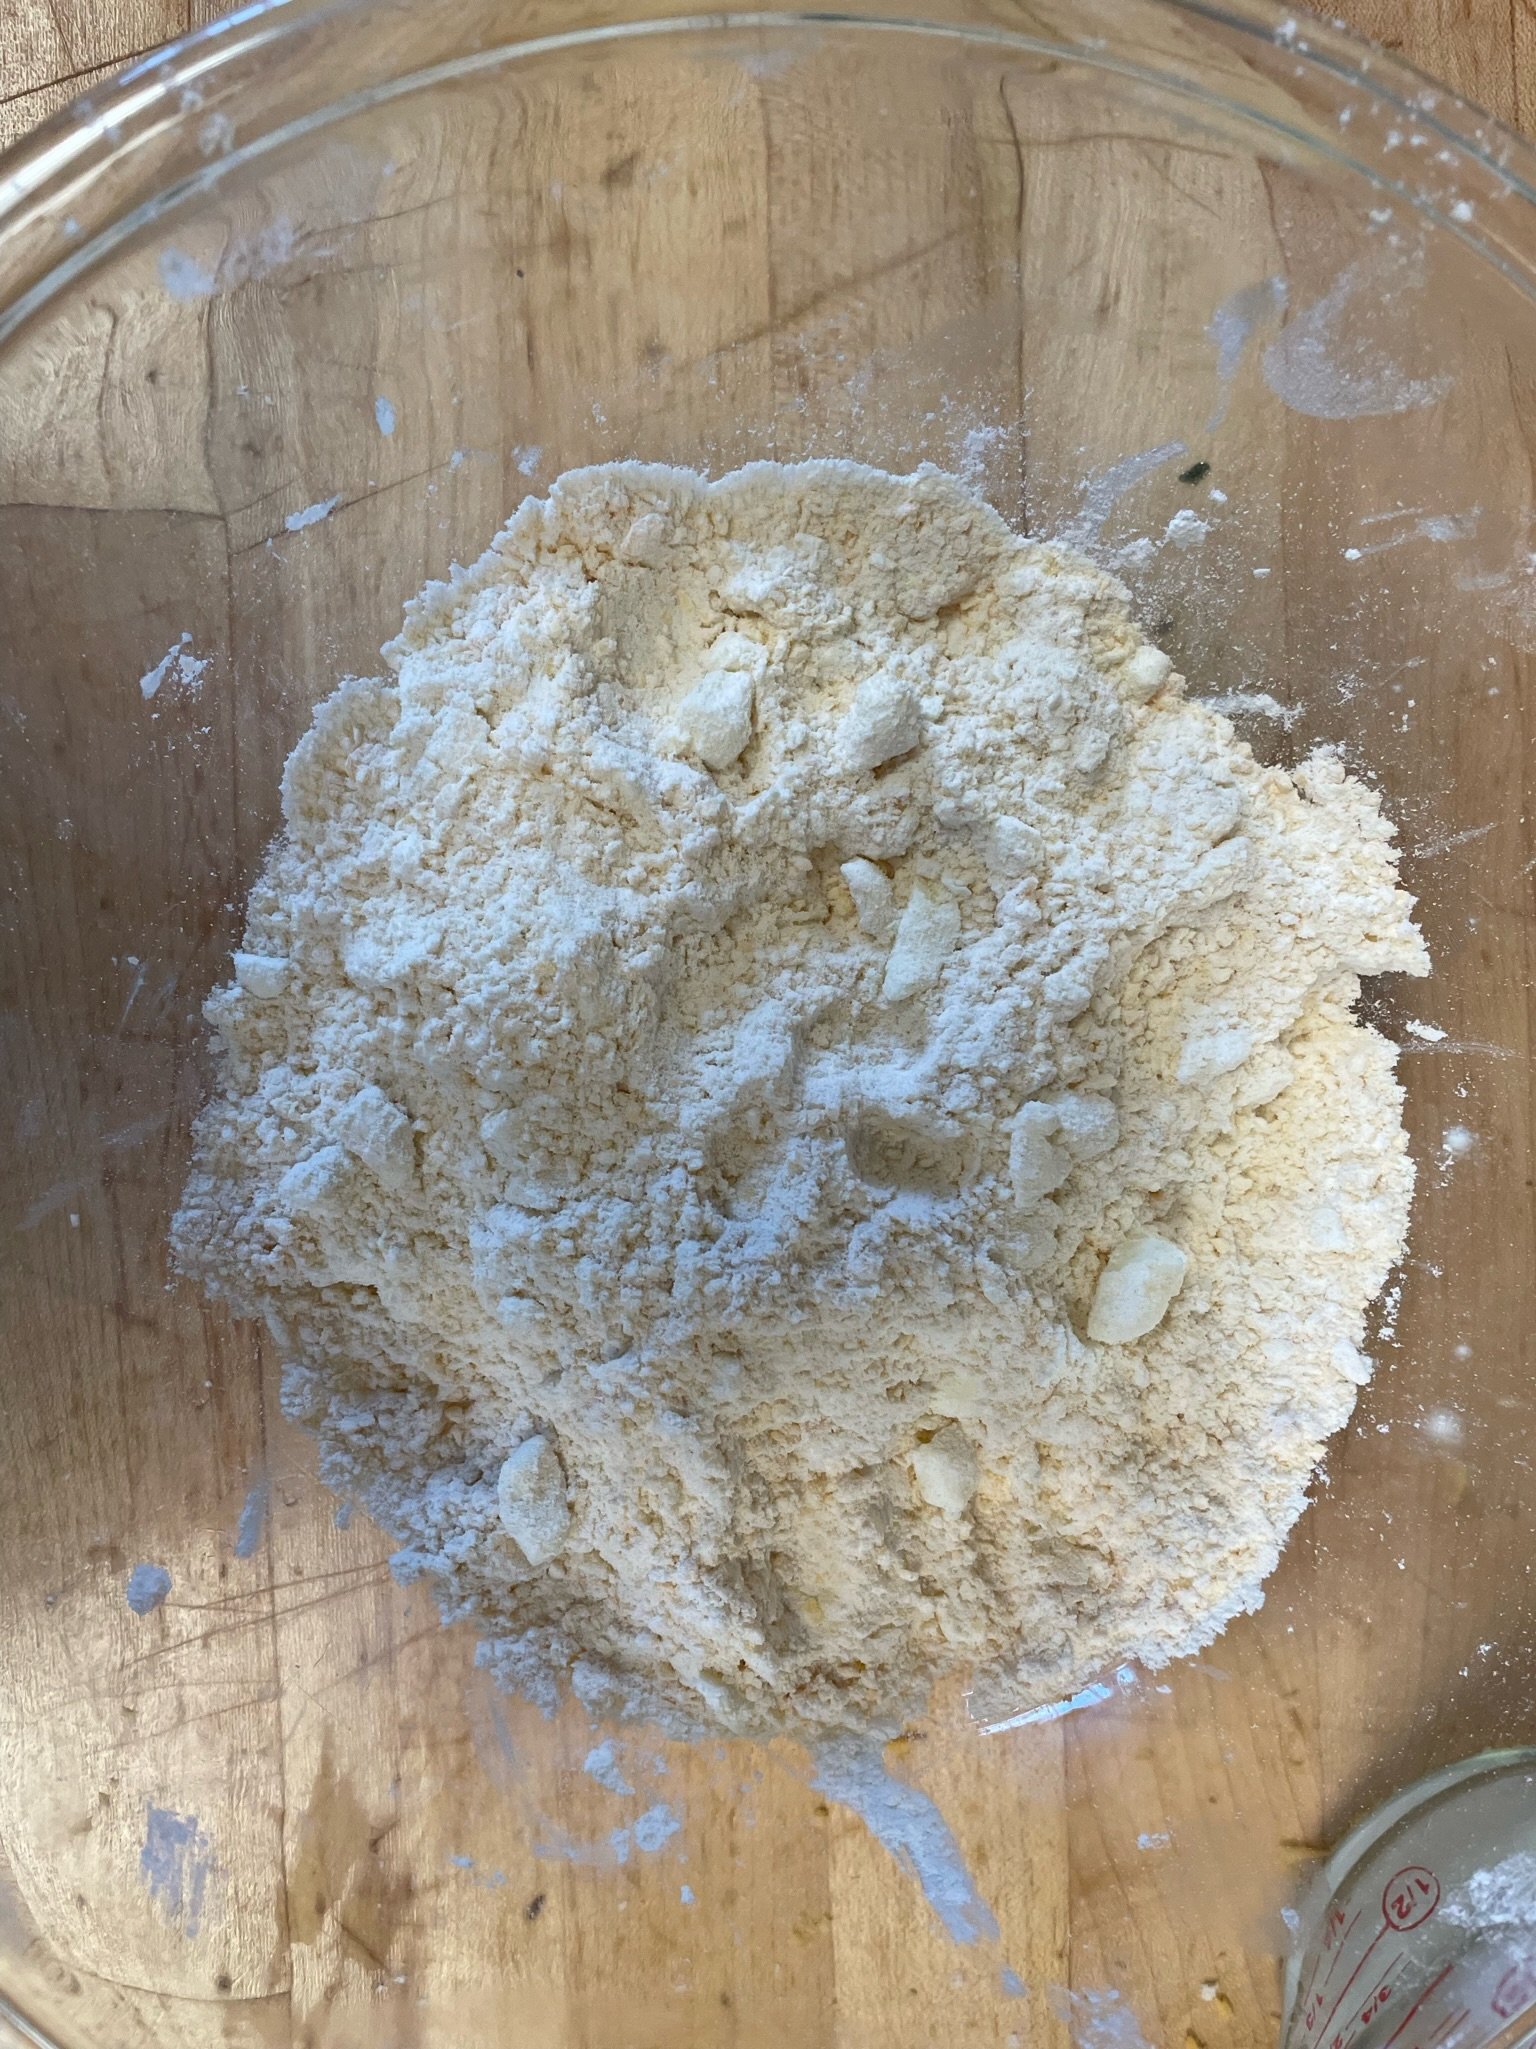
1. Wash and dry your hands, make sure your counter is clean, then take a deep breath. It’s just pie! In a large, wide bowl, stir together flour, salt, and grated cheddar. Dice the butter and sprinkle the pieces over the flour mixture. Then, using your hands, two knives, or a pastry blender, work the butter into the flour until the mixture resembles a coarse meal, with some larger lumps of butter resembling peas or even small almonds. These larger pieces will make your crust flaky!
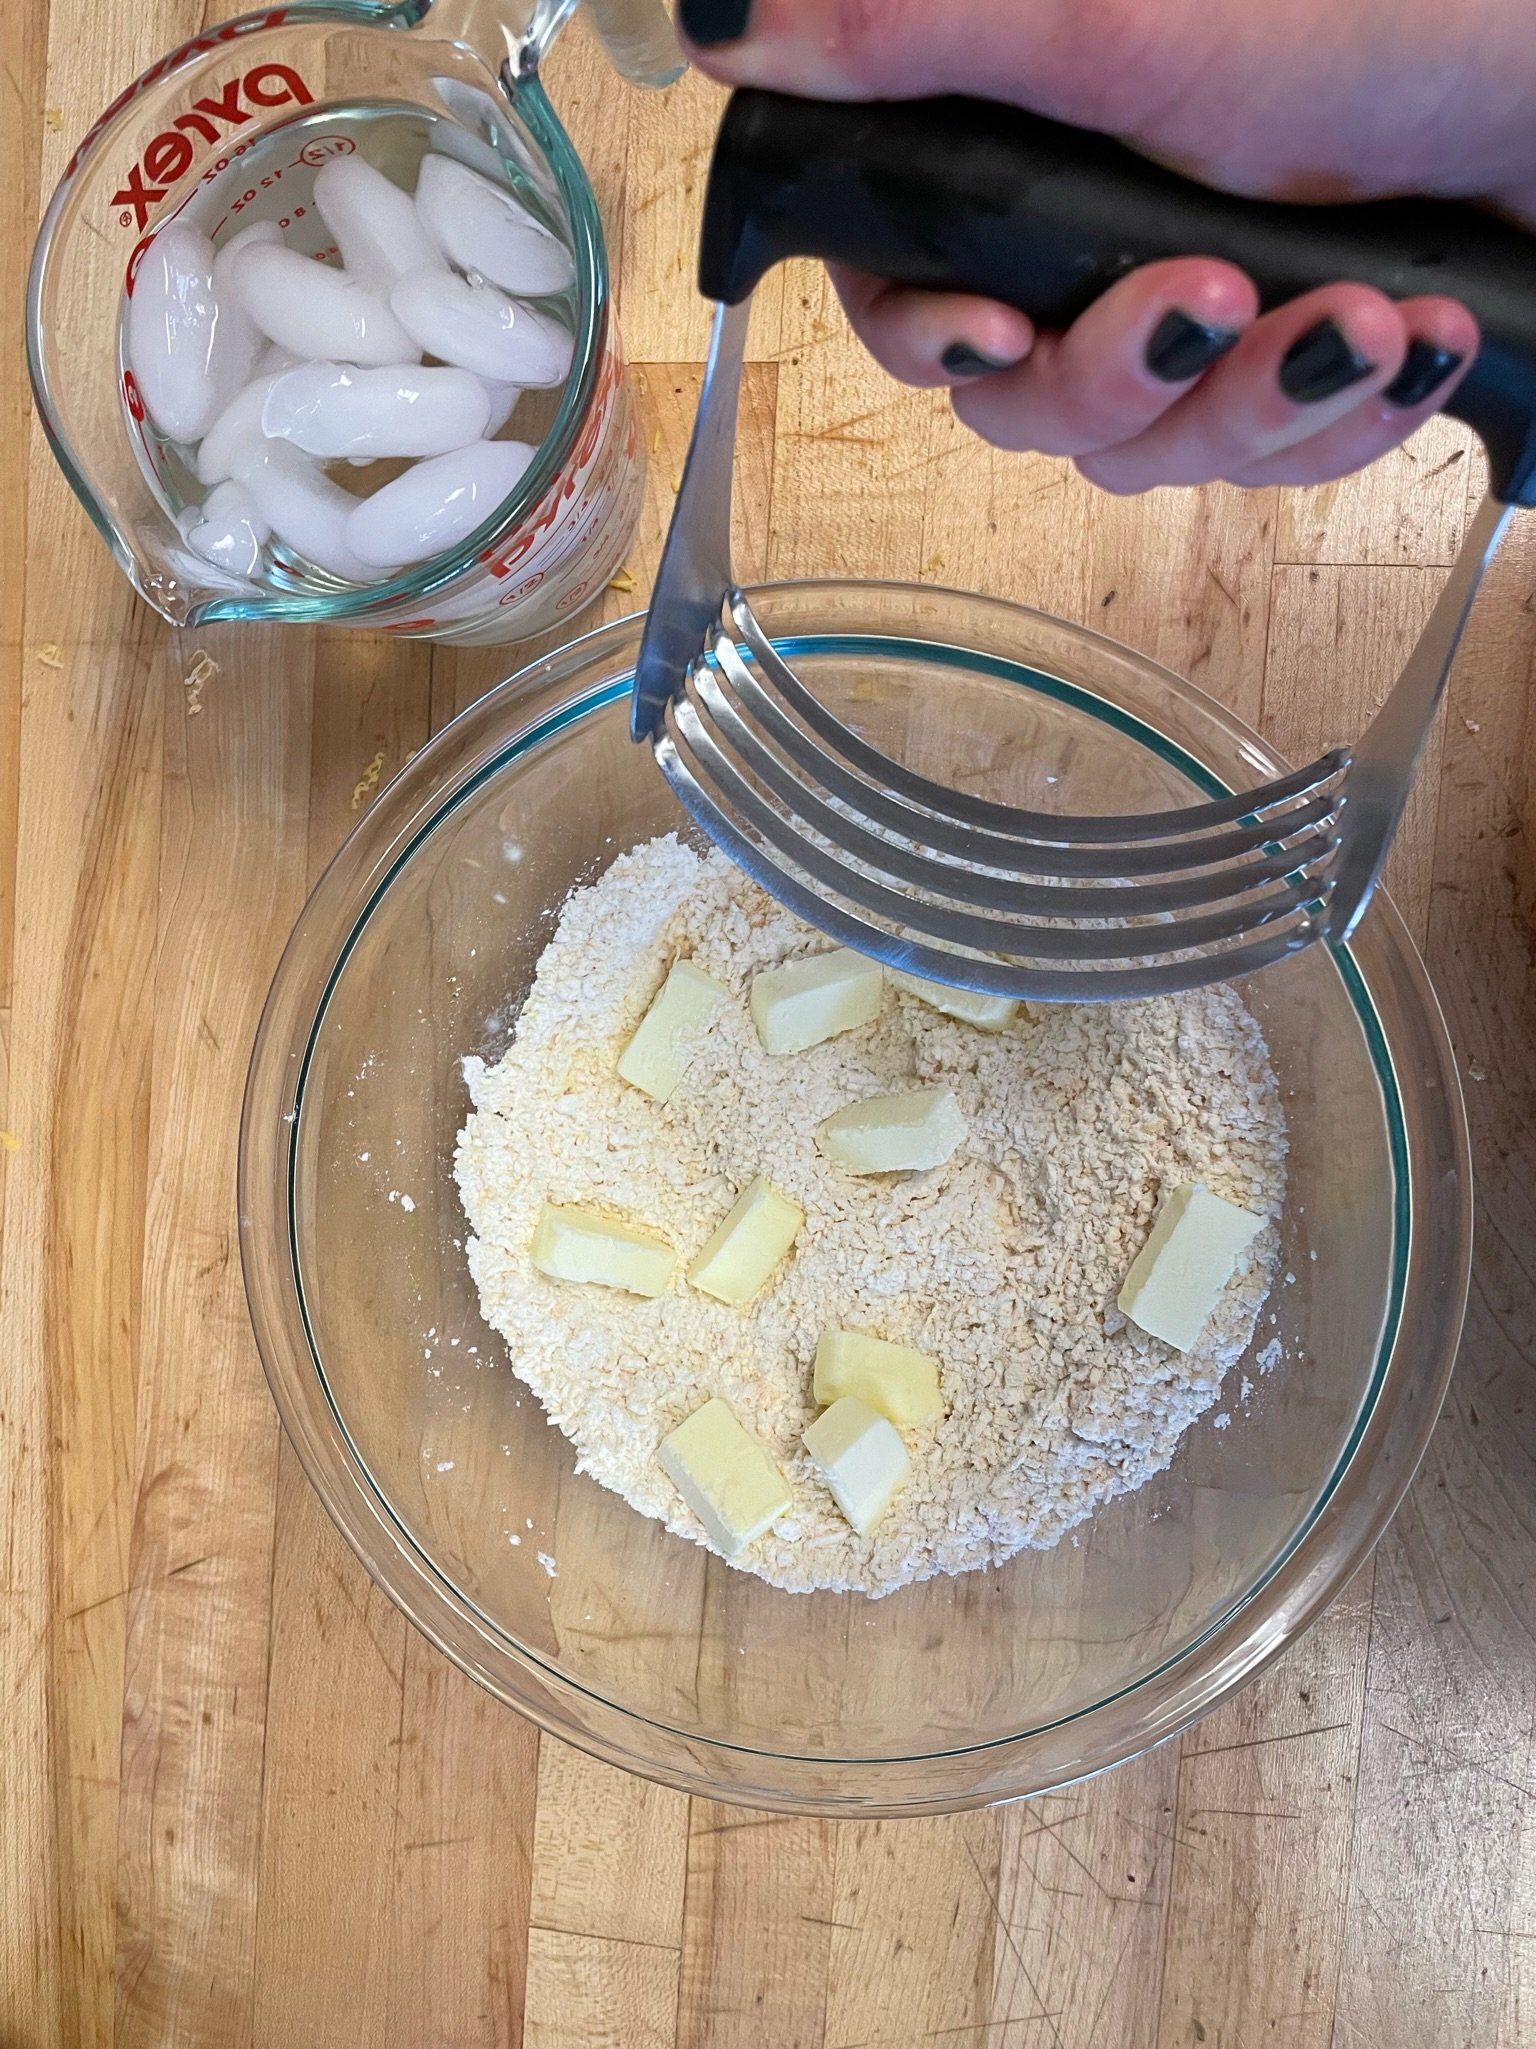
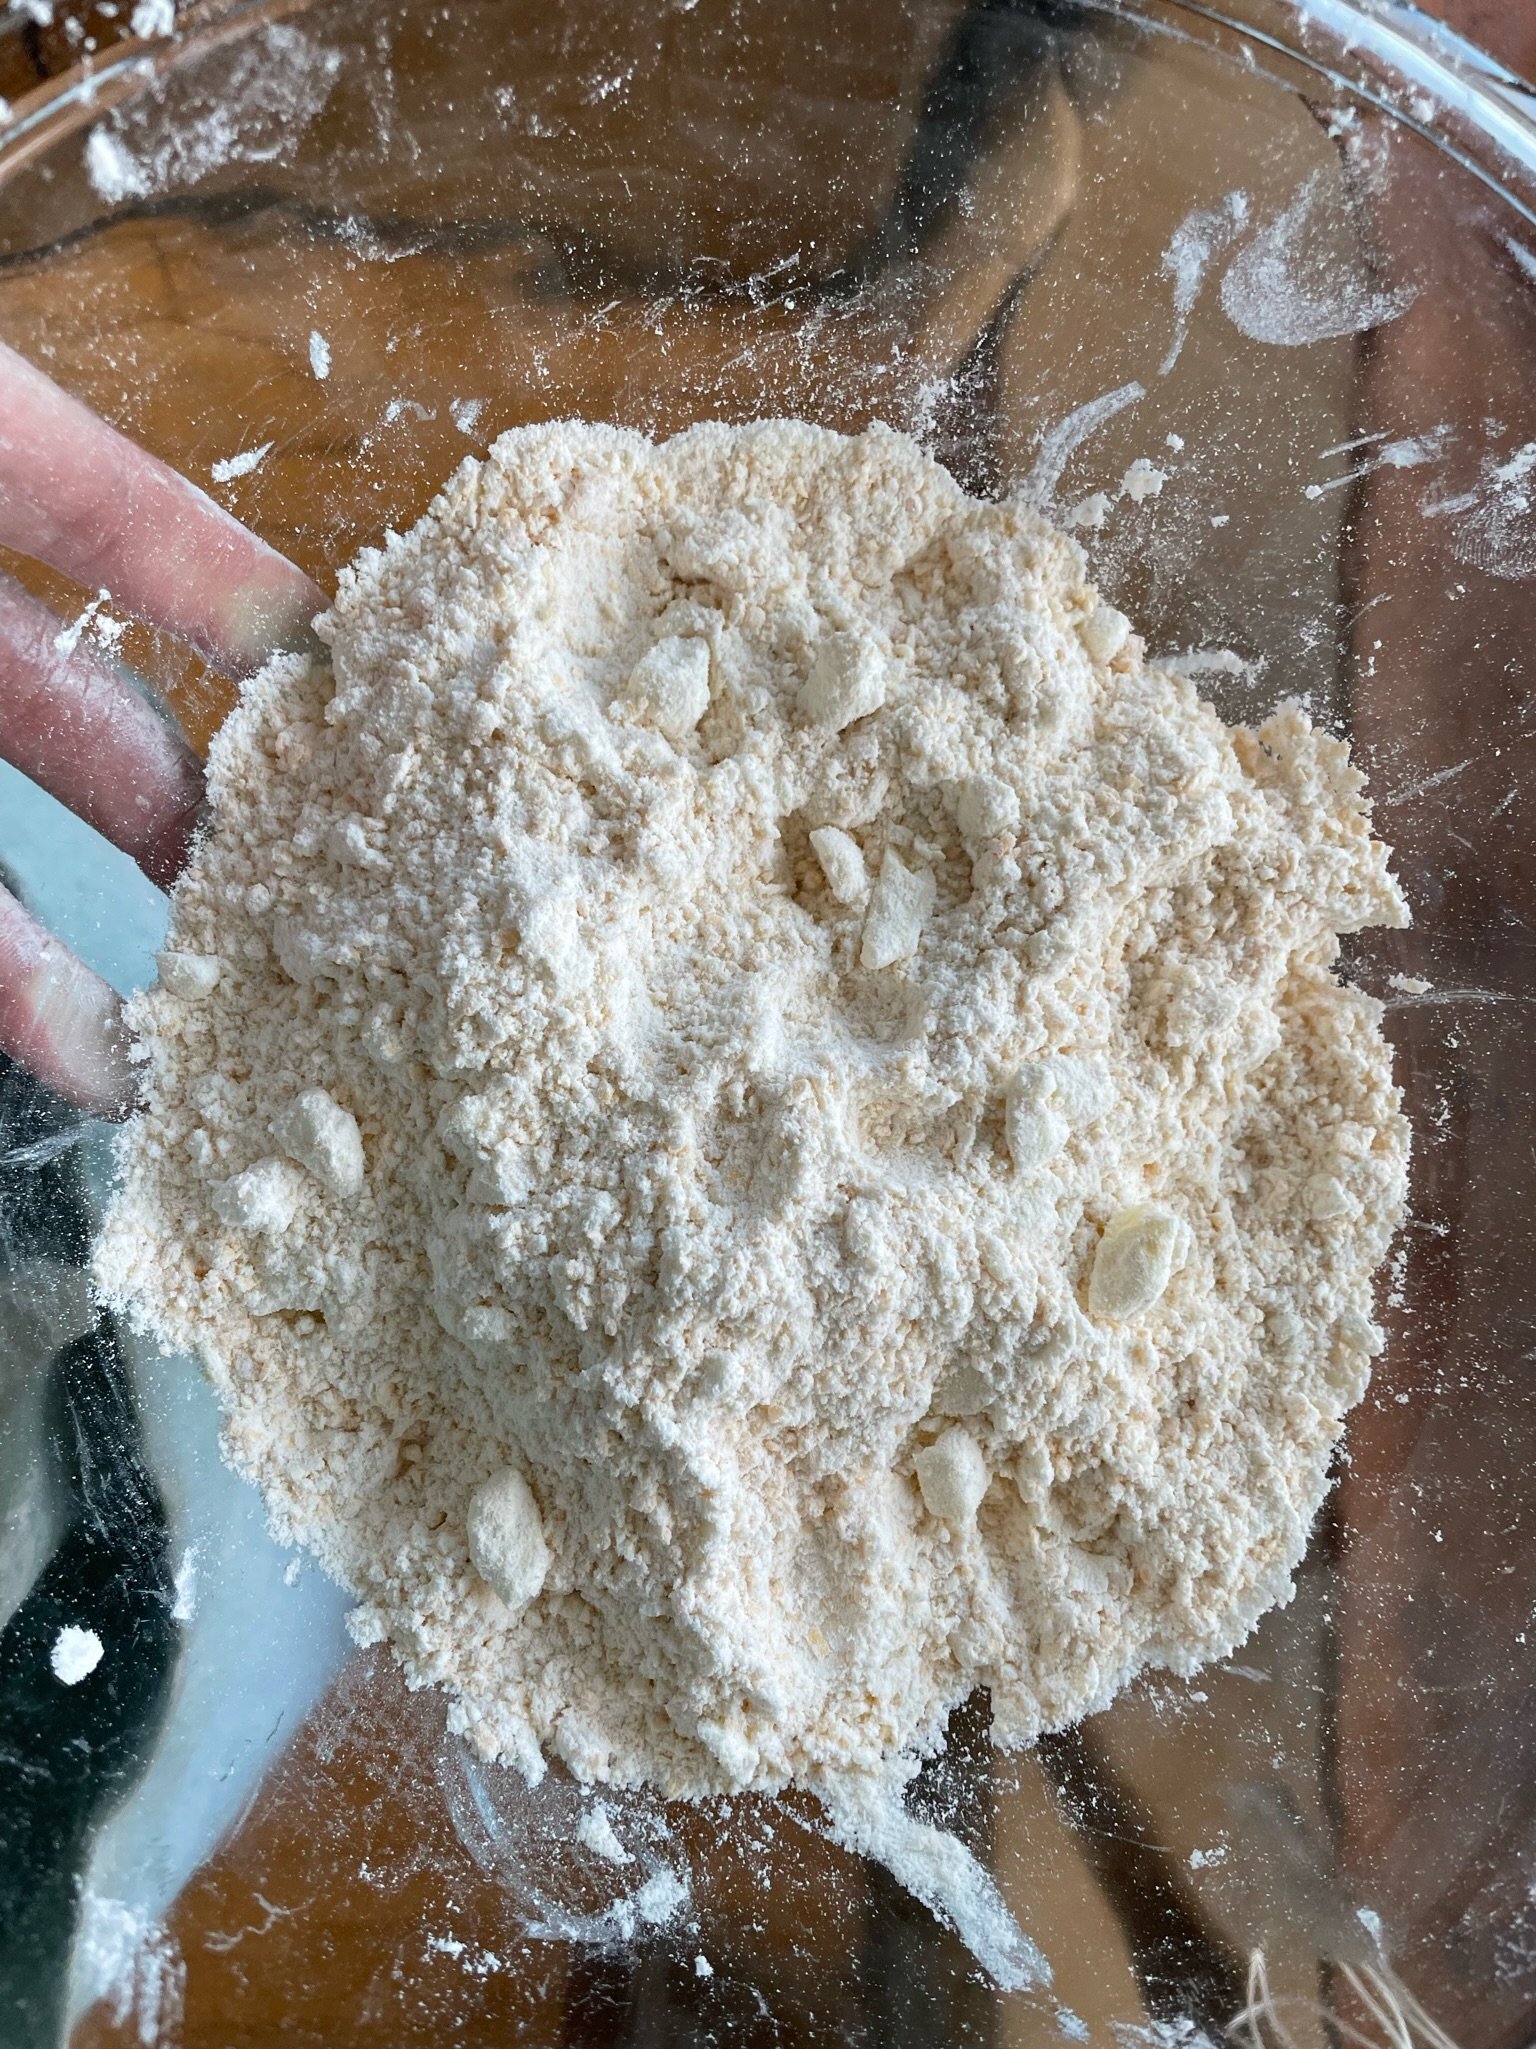
2. Sprinkle 3 tbsp water (or 6, if you’re making a double crust) over the butter-flour mix. I like to stir with a fork until large clumps begin to form, then switch to kneading in the bowl with my hands to bring the dough together. Use extra tbsp water if needed.
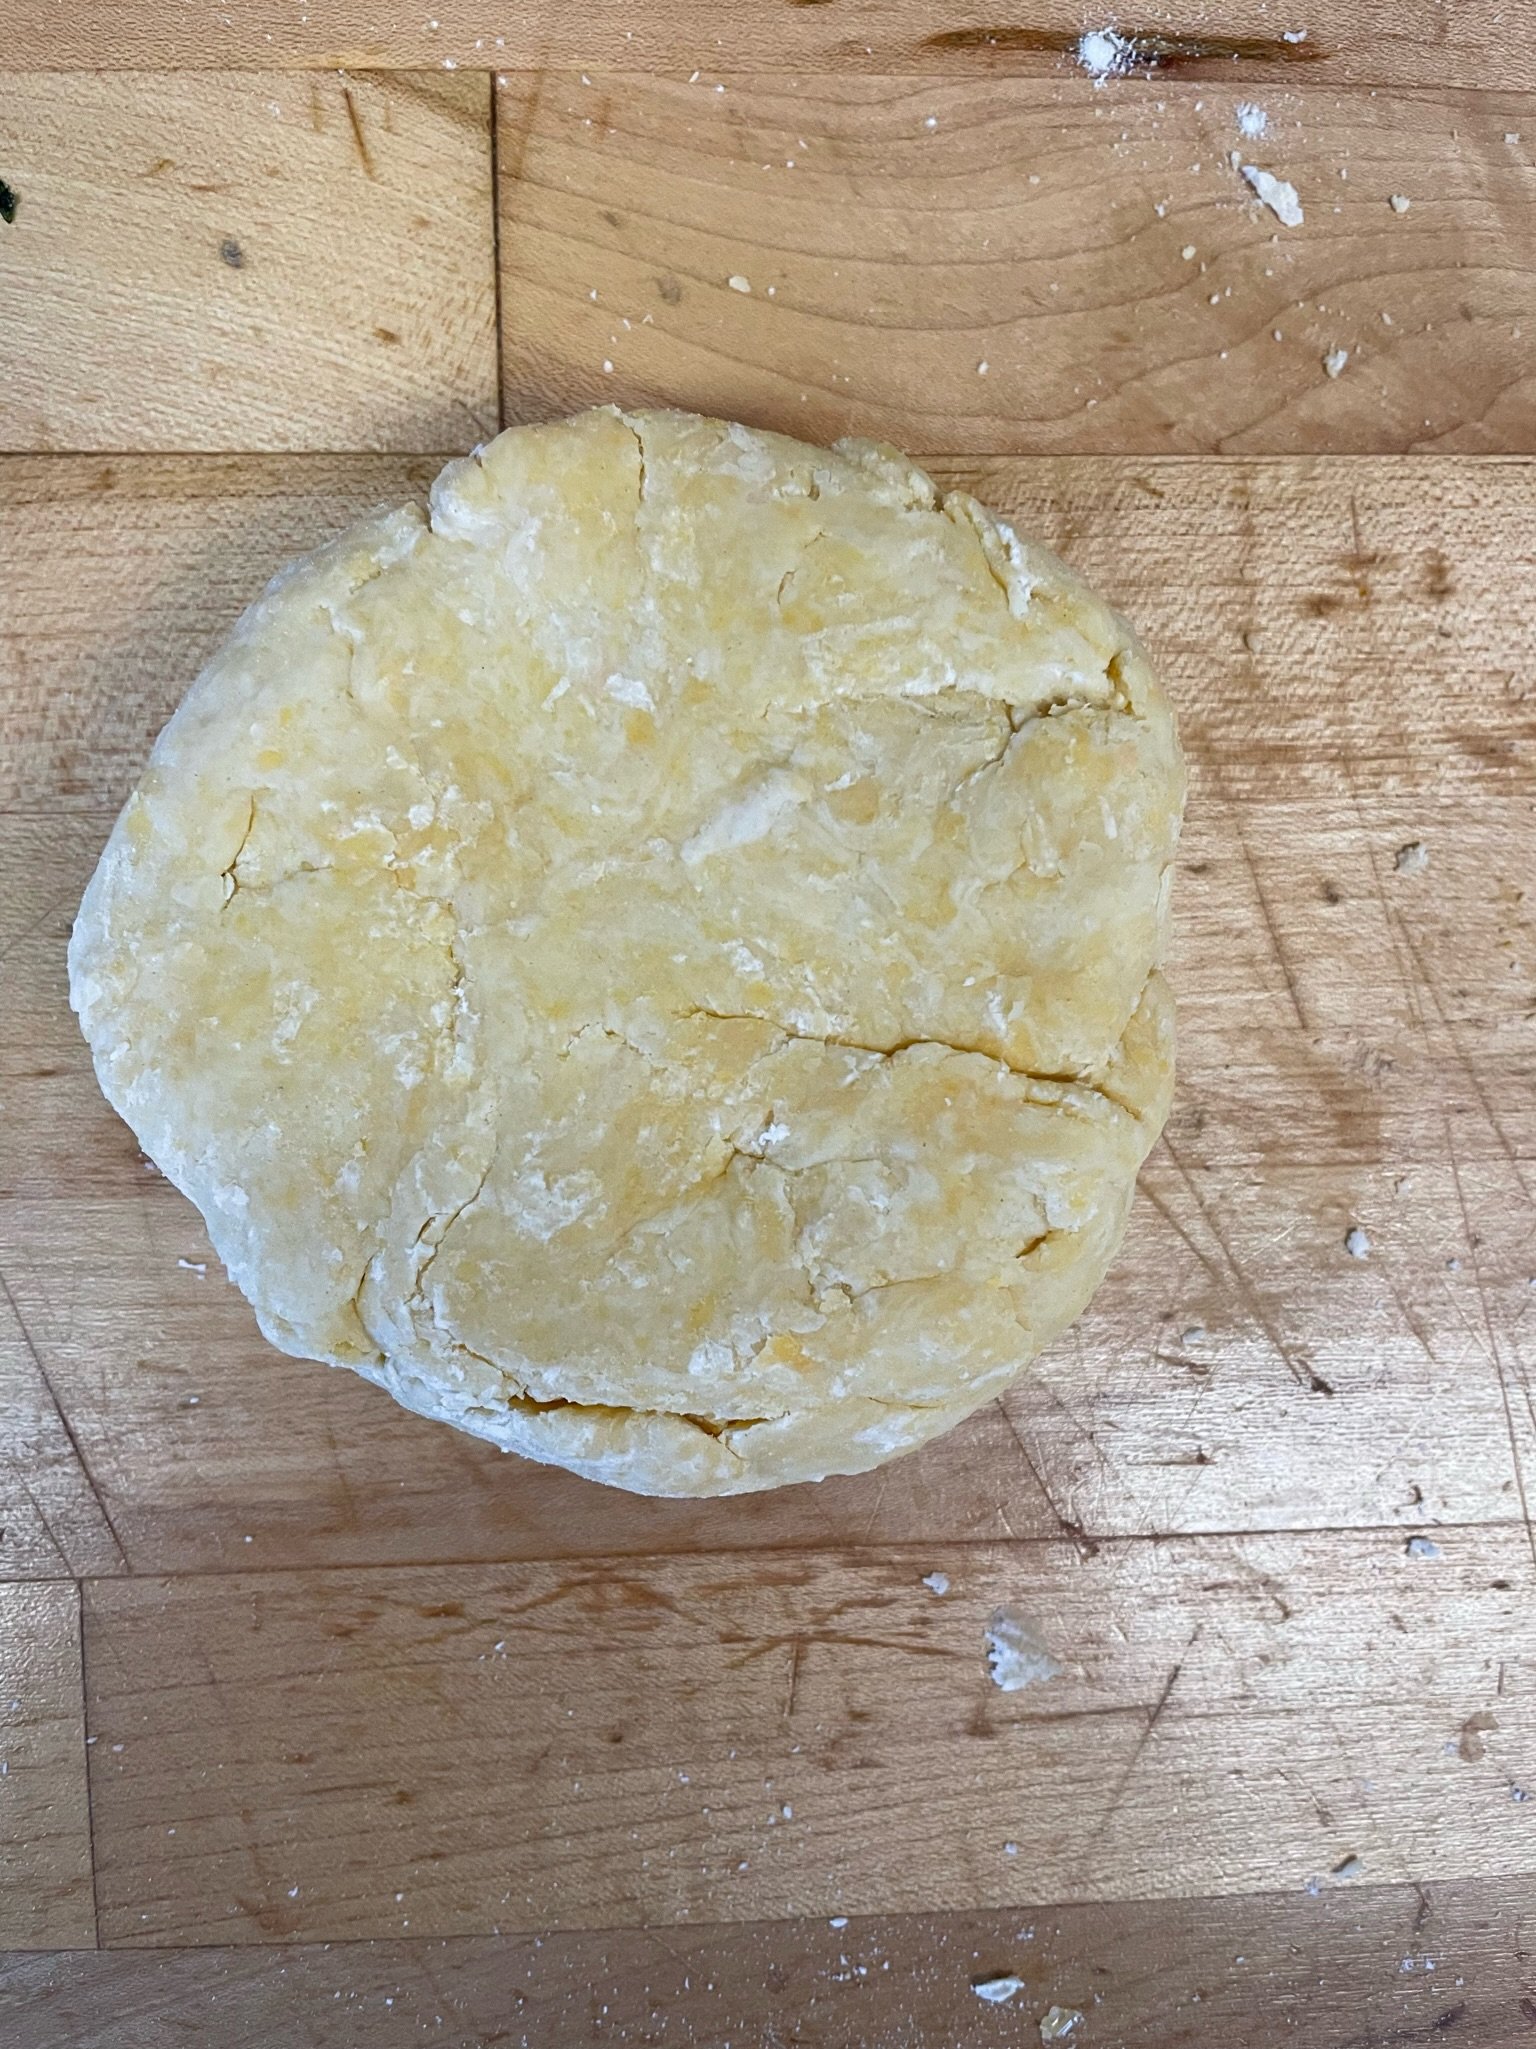
3. If you’re making a double crust, divide the dough in two. Then pat the dough into a chubby disk (or two), around 4 inches in diameter. Wrap in plastic and stick in the fridge to chill until you’re ready to roll it out, or at least an hour.

Prep the Filling:
Peel, quarter, core, and thinly slice the apples. Then, in your largest mixing bowl, combine with sugar, flour, salt, spices, and lemon juice, and toss to coat as evenly as possible. Let sit at room temperature to macerate while you prep the crumble topping (if making) and roll out the crusts!

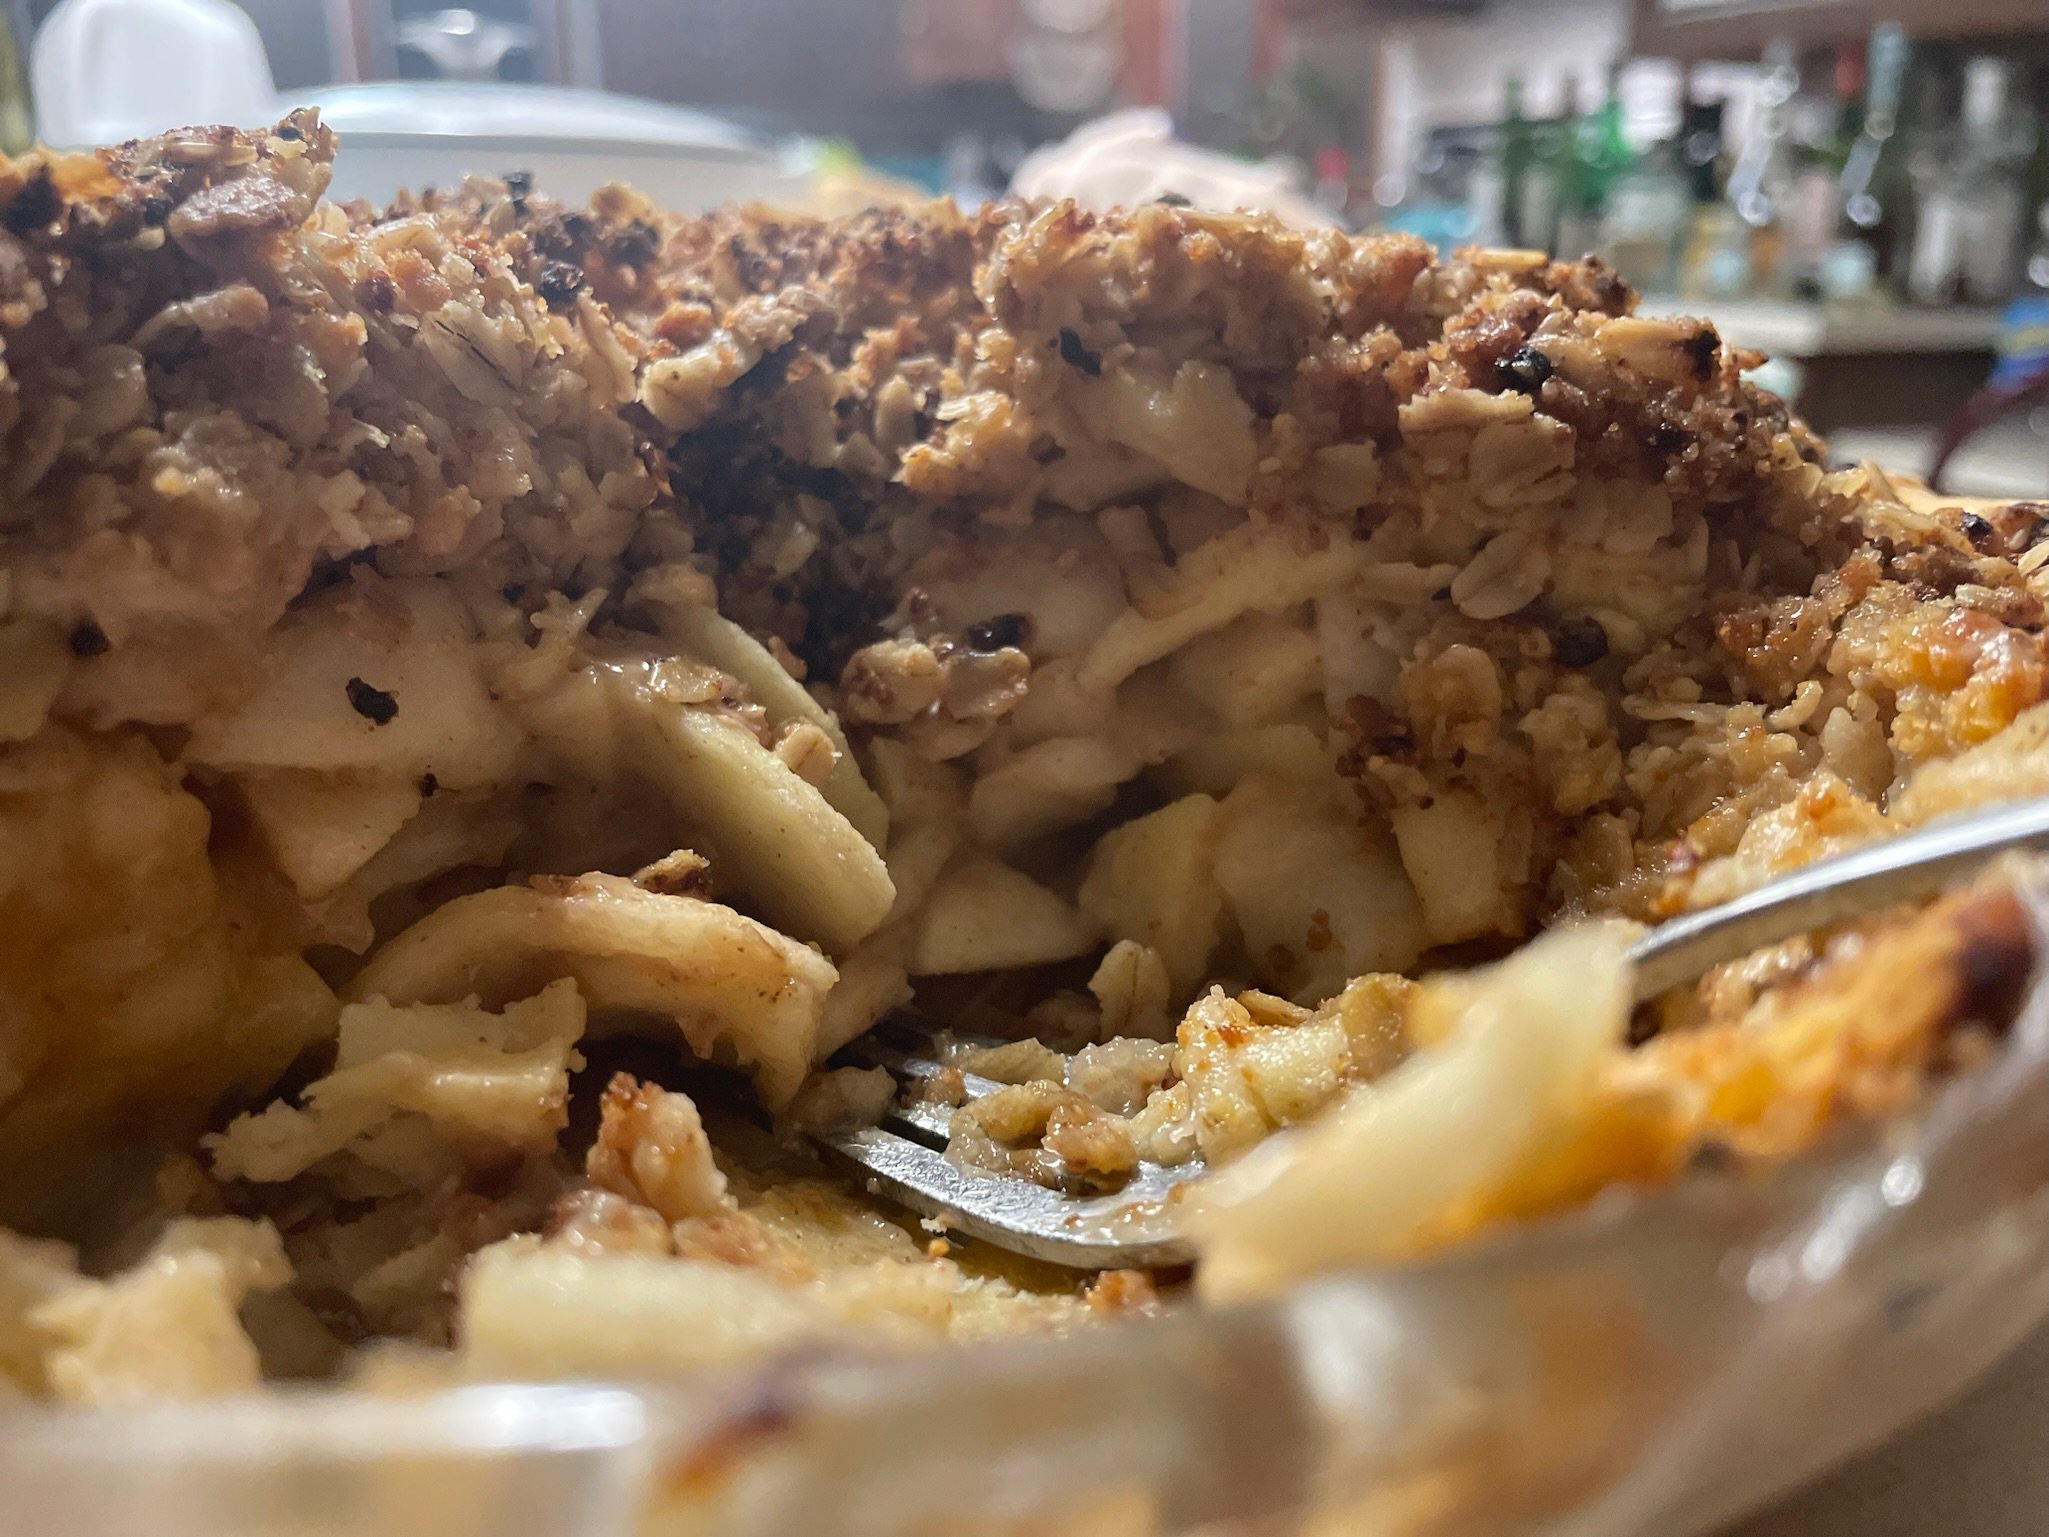
Prep the Crumble Topping, if using:
Melt butter and let cool slightly. I usually just do this in the microwave! Stir in oats, brown sugar, flour, salt, and ginger—if you use a fork, crumbles will naturally begin to form. Add the cheddar last and stir again until combined. Refrigerate until needed.
Roll Out the Dough:
1. This is really, truly, not as hard as everybody makes it seem! Remove dough from the fridge and sprinkle a clean counter top generously with flour. Find something long and tubular to use as a rolling implement—this can be a beautiful heirloom wooden rolling pin or a clean empty wine bottle that you dust lightly with flour, or anything in between.
2. Unwrap dough and place on floured counter. Dust rolling pin and dough lightly with more flour, then place pin in the center of the dough. Using gentle pressure, roll out to just before the top edge of the crust. Then pick up the pin, place it back in the center, and roll out to just before the bottom edge.
3. Turn the dough a quarter turn, so that the right and left edges are now the top and bottom. Roll out from the center again, then continue turning and rolling until your crust is thin and about 12 inches in diameter. The edges might crack, mine nearly always do, and this is okay, because it is still going to taste delicious.
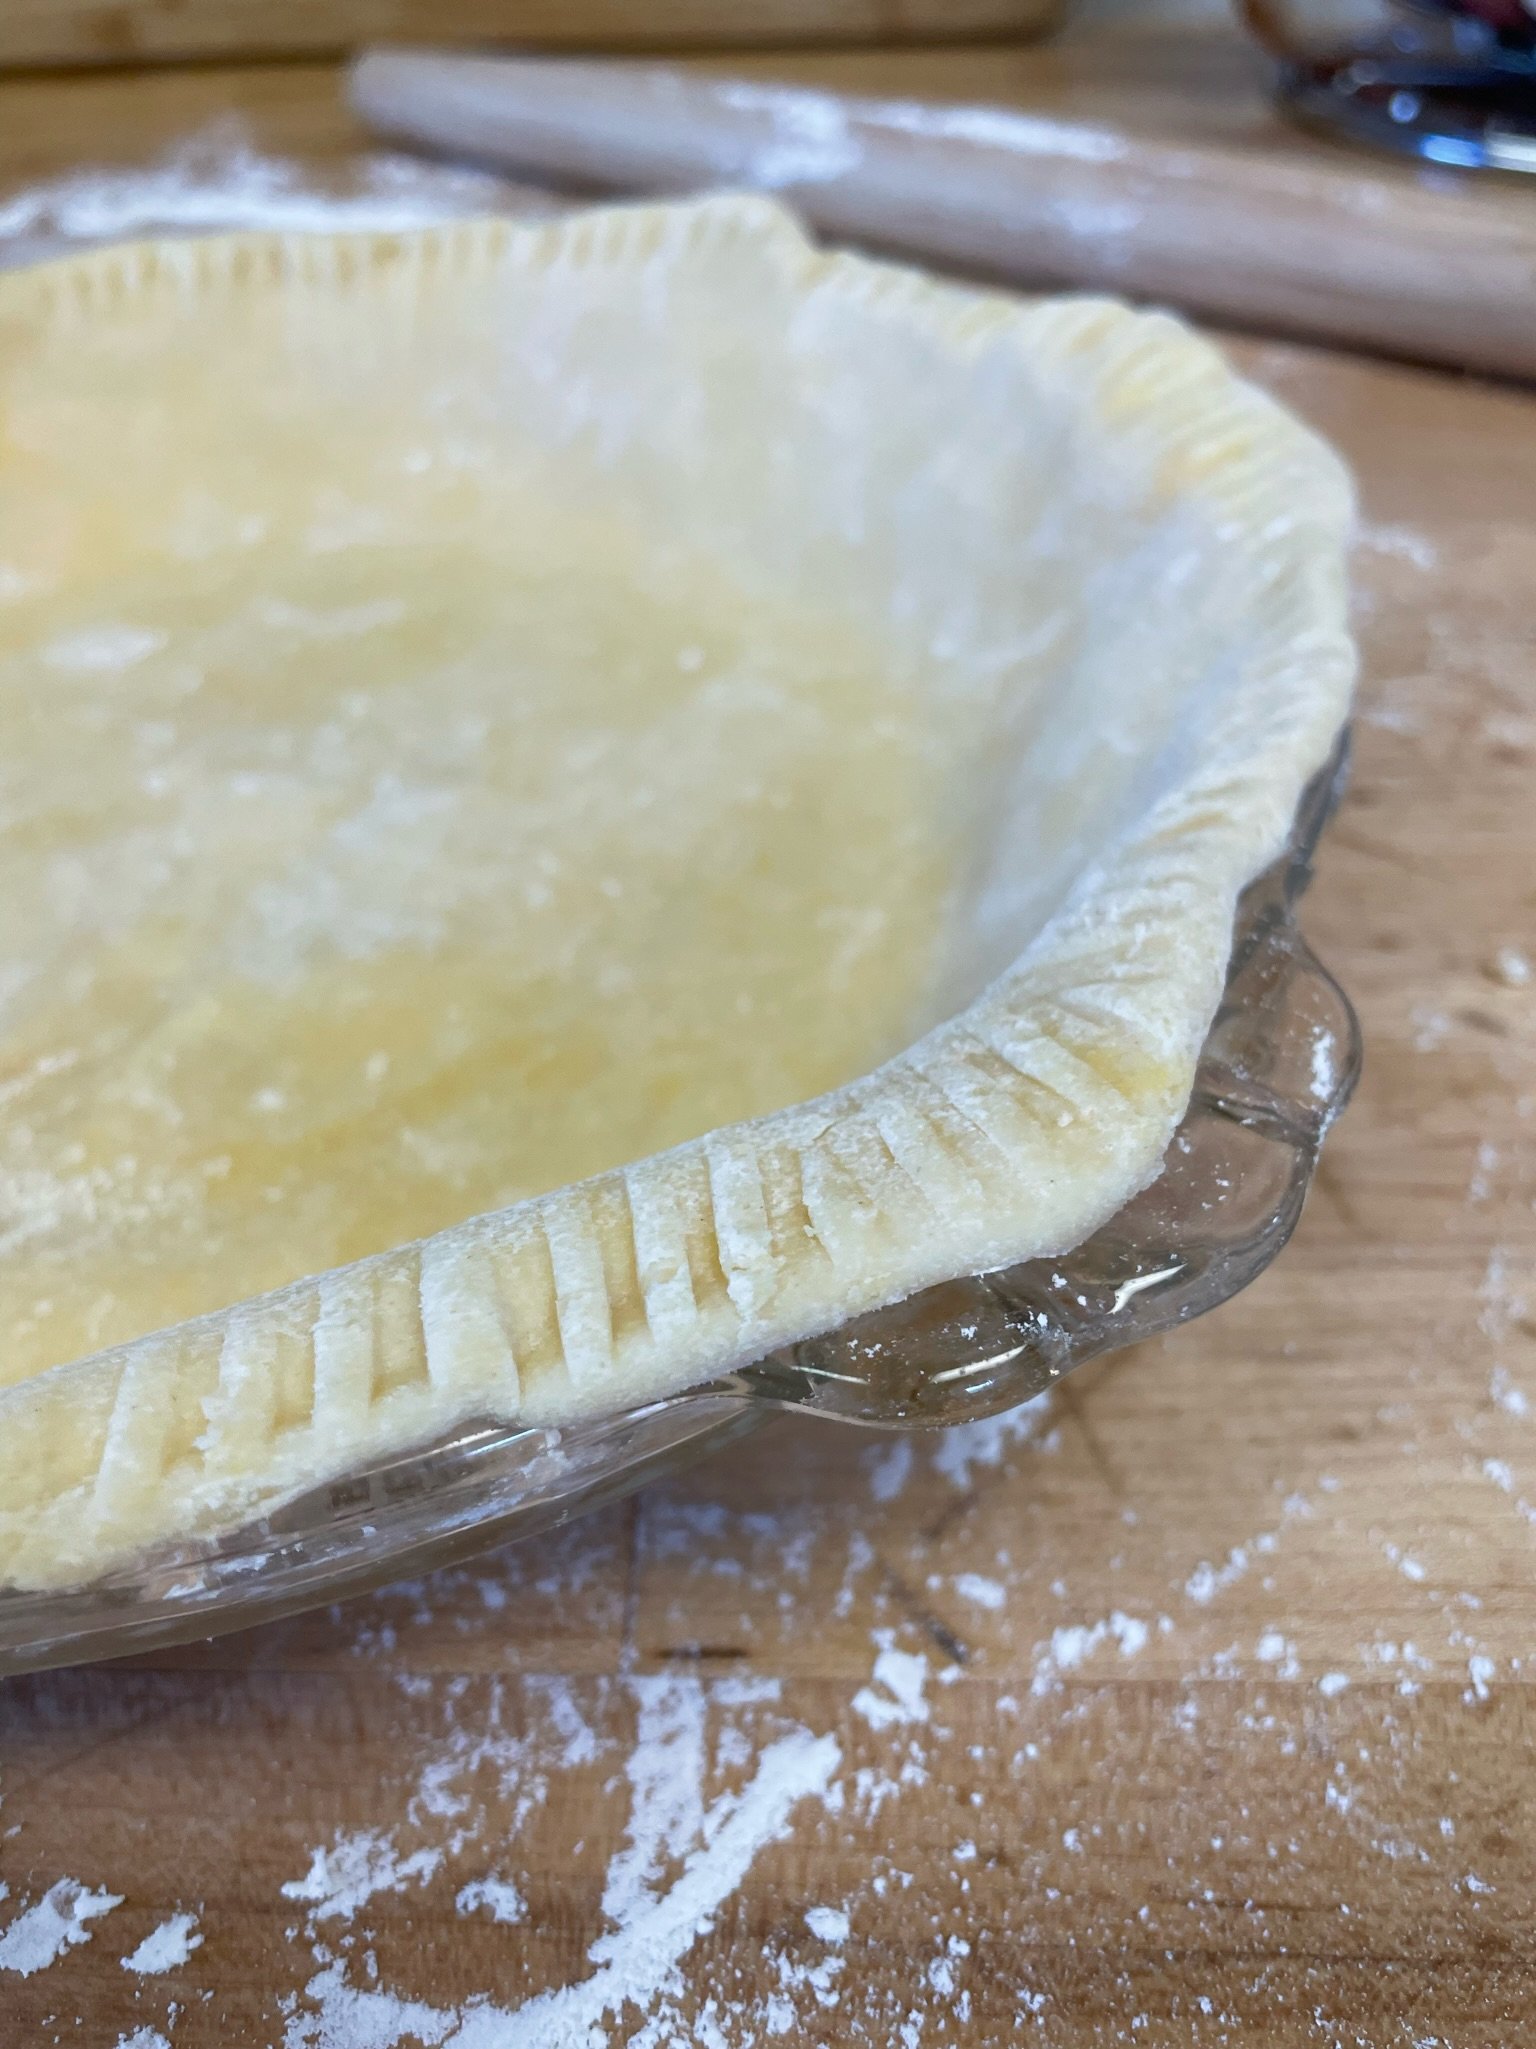
4. Fold crust gently into quarters, dust off some of the flour, and unfold into a 9 inch pie pan (standard or deep dish both work fine!) Fold edges under as simply or decoratively as you like—I usually just press them down with the tines of a fork. And you did it! You’re done!
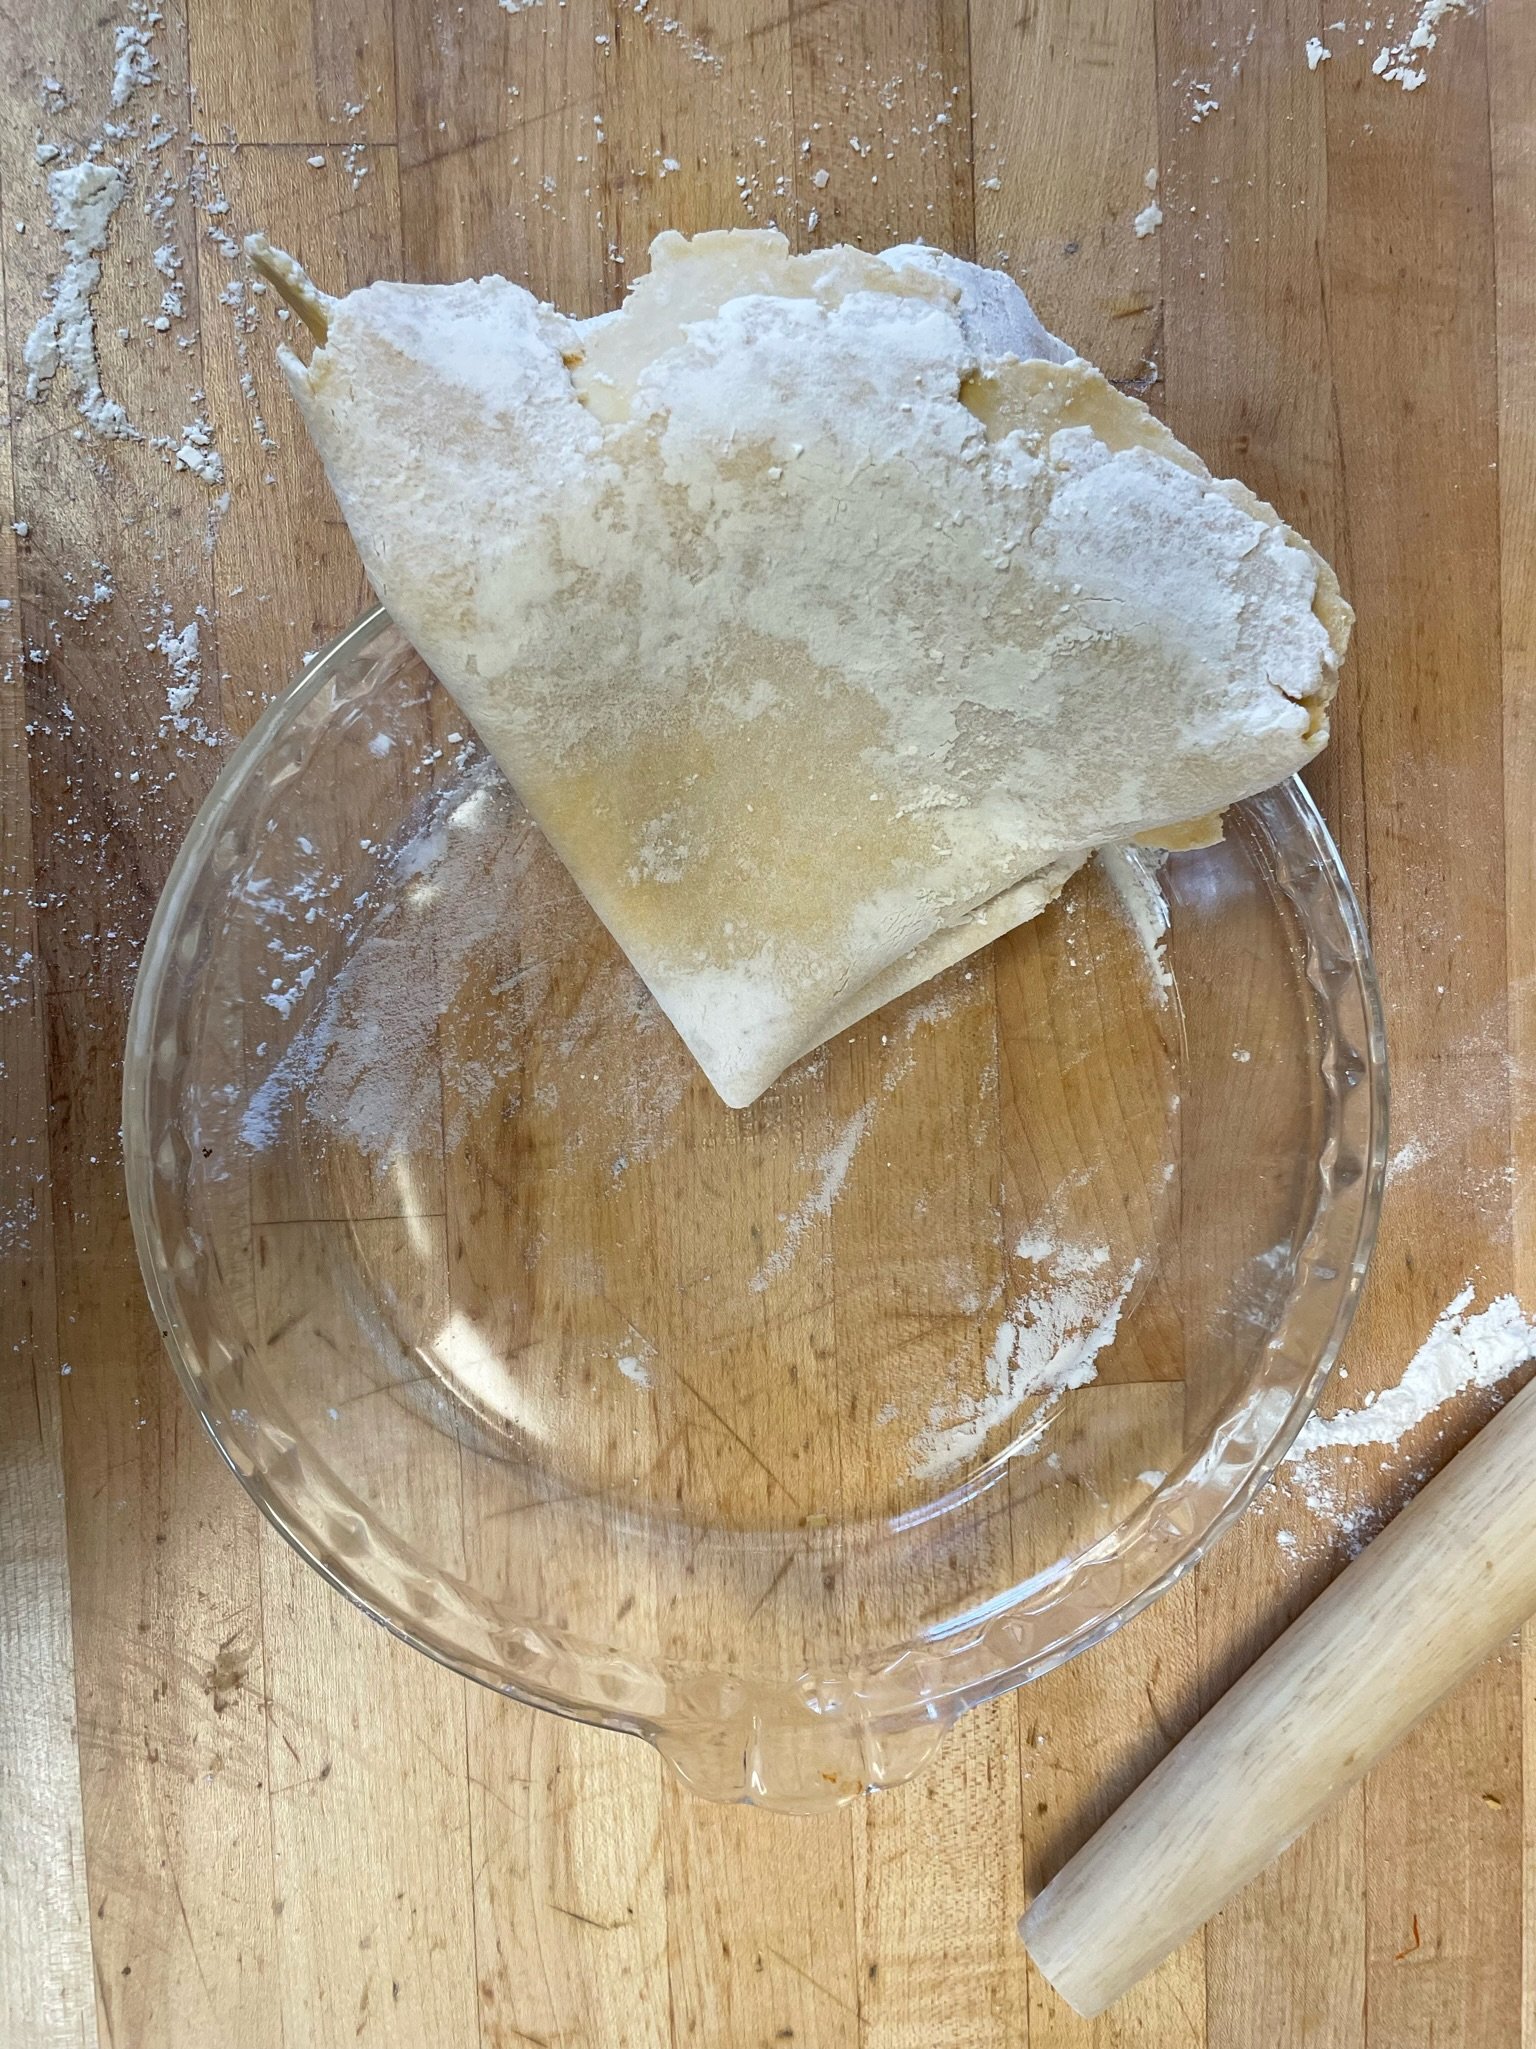

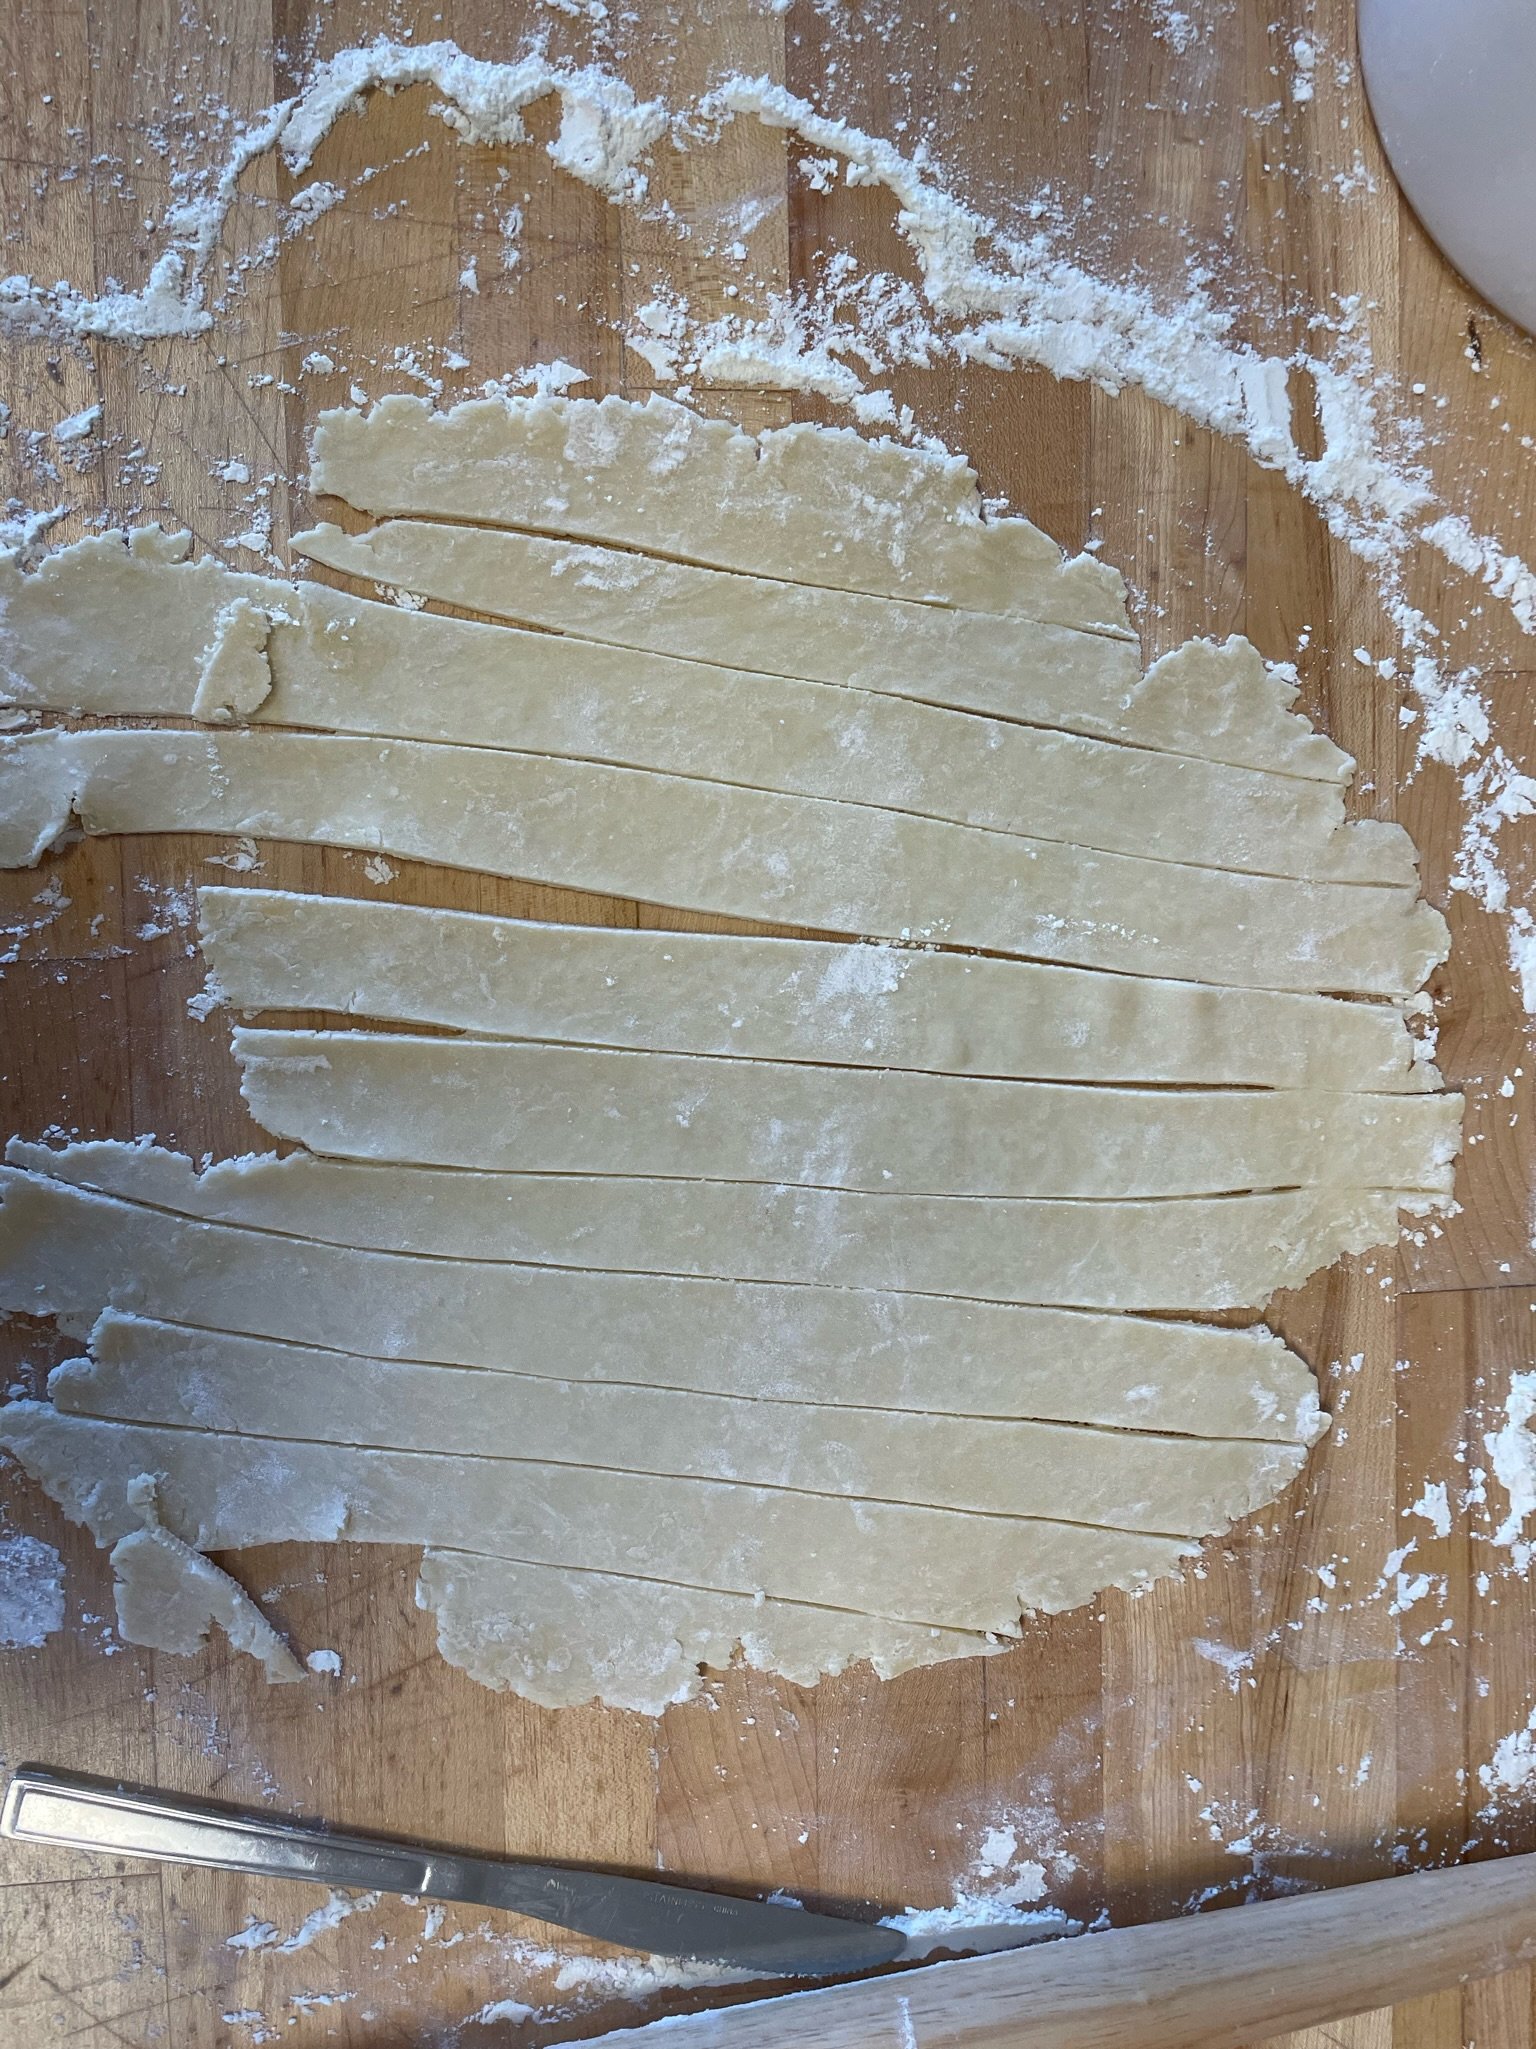
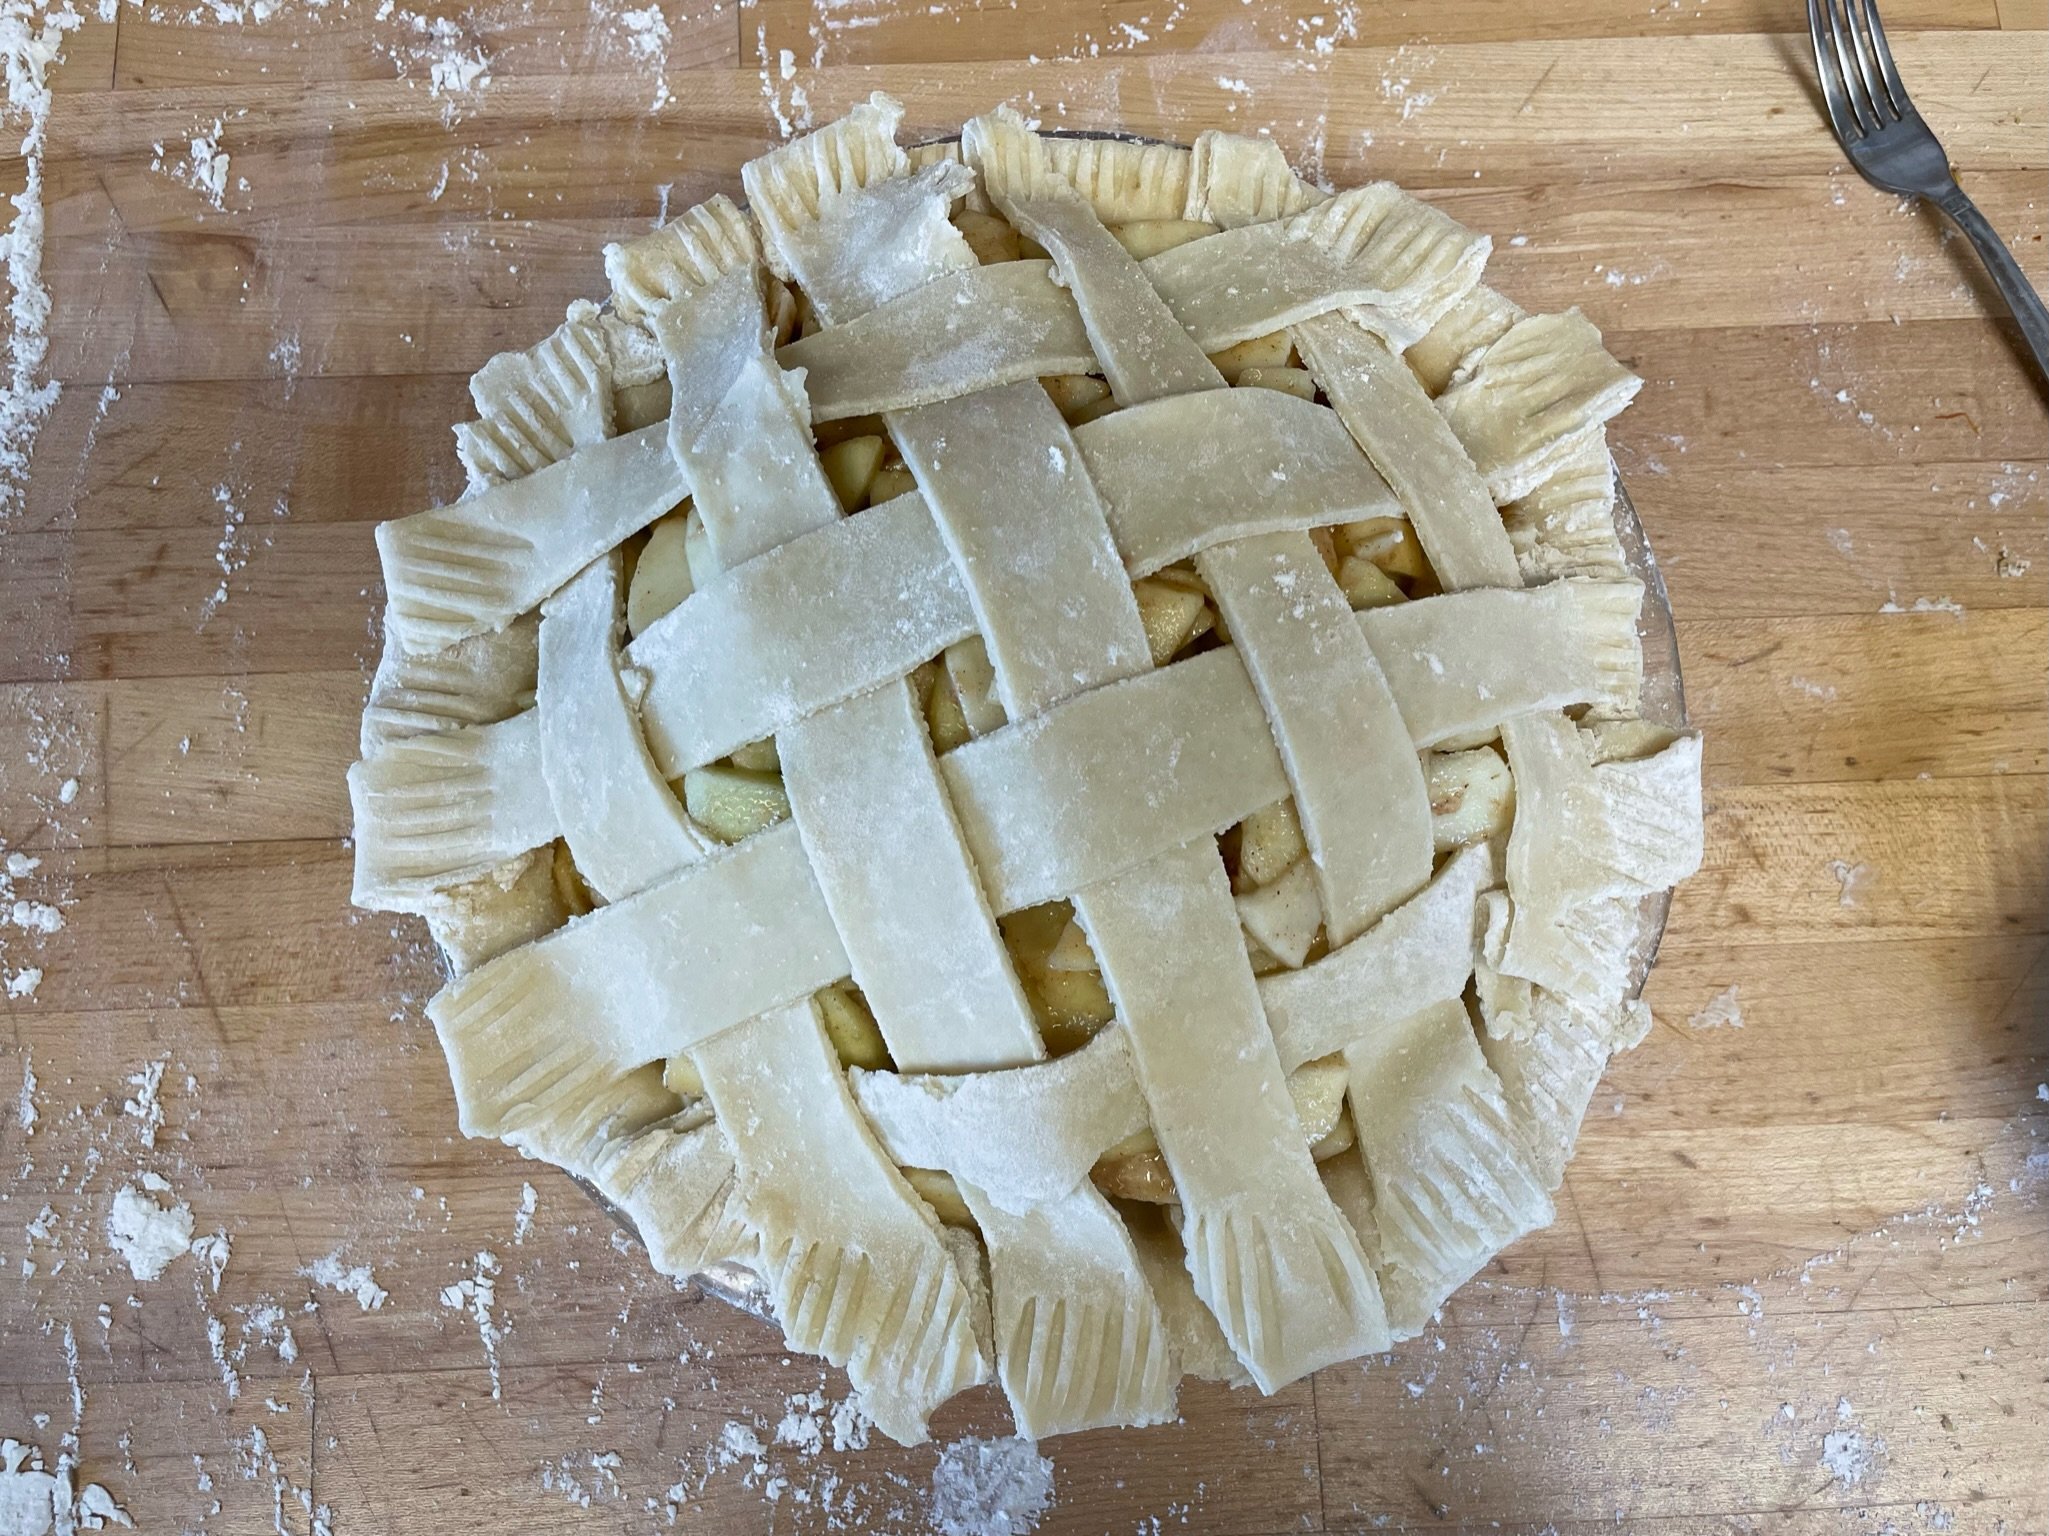
5. If you’re making a crumble top pie, proceed to the next section. If you’re making a lattice top pie, re-flour your counter and pin and roll out second dough disk as above, then cut with a butter knife into 9 long strips an inch or so wide.
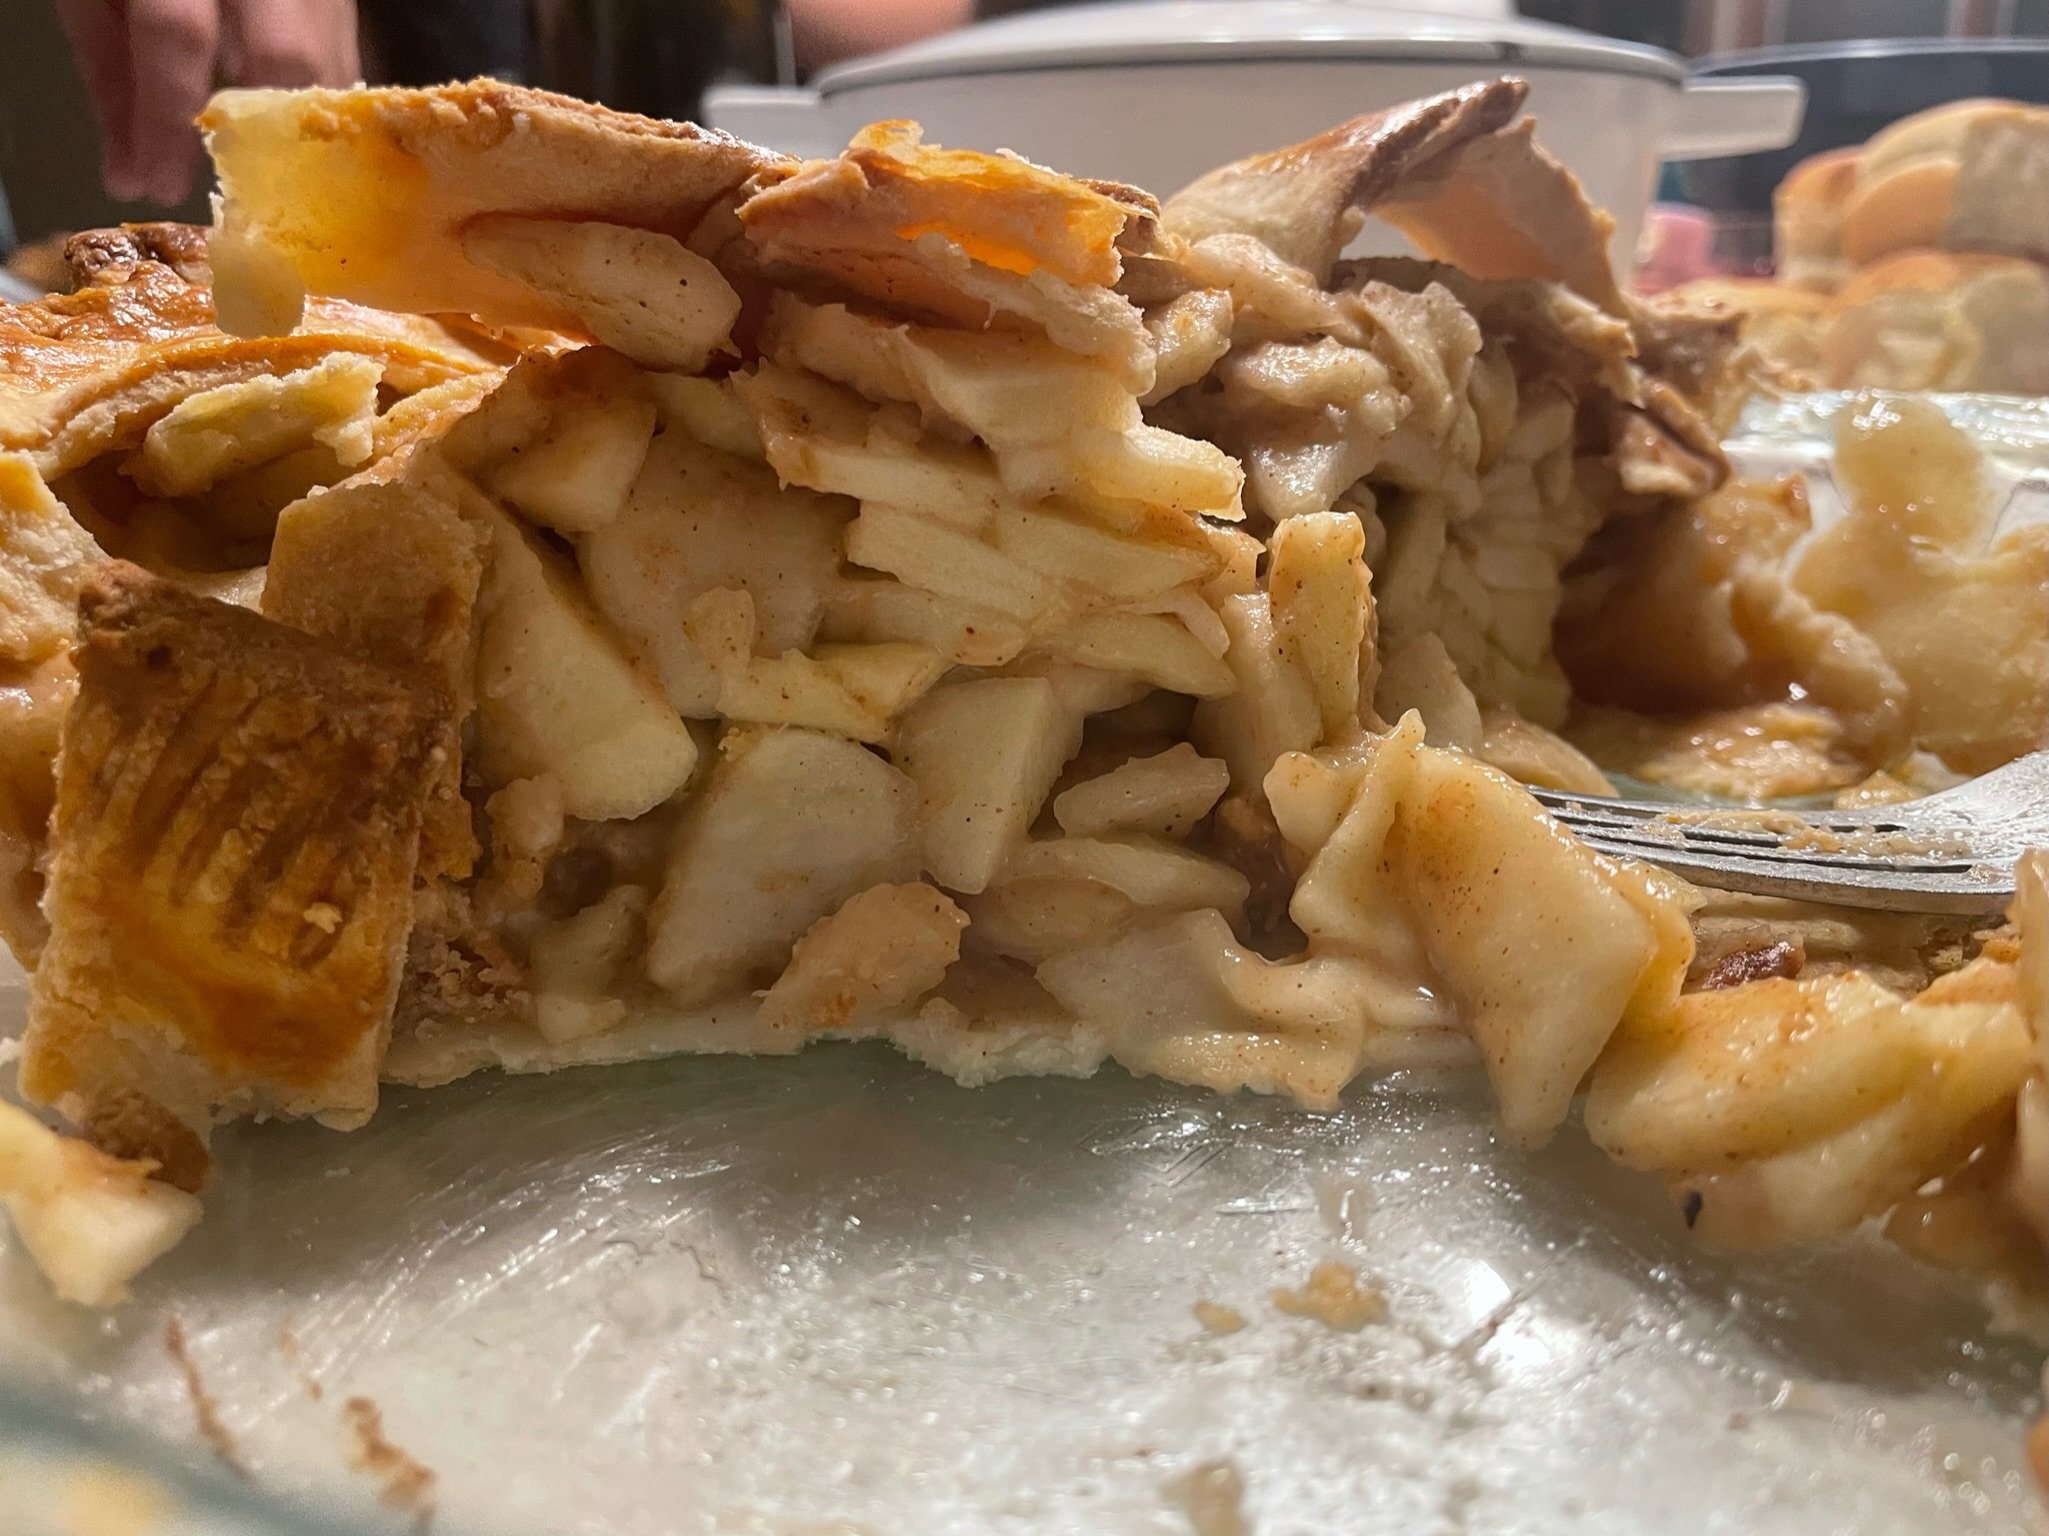
Assemble the Pie:
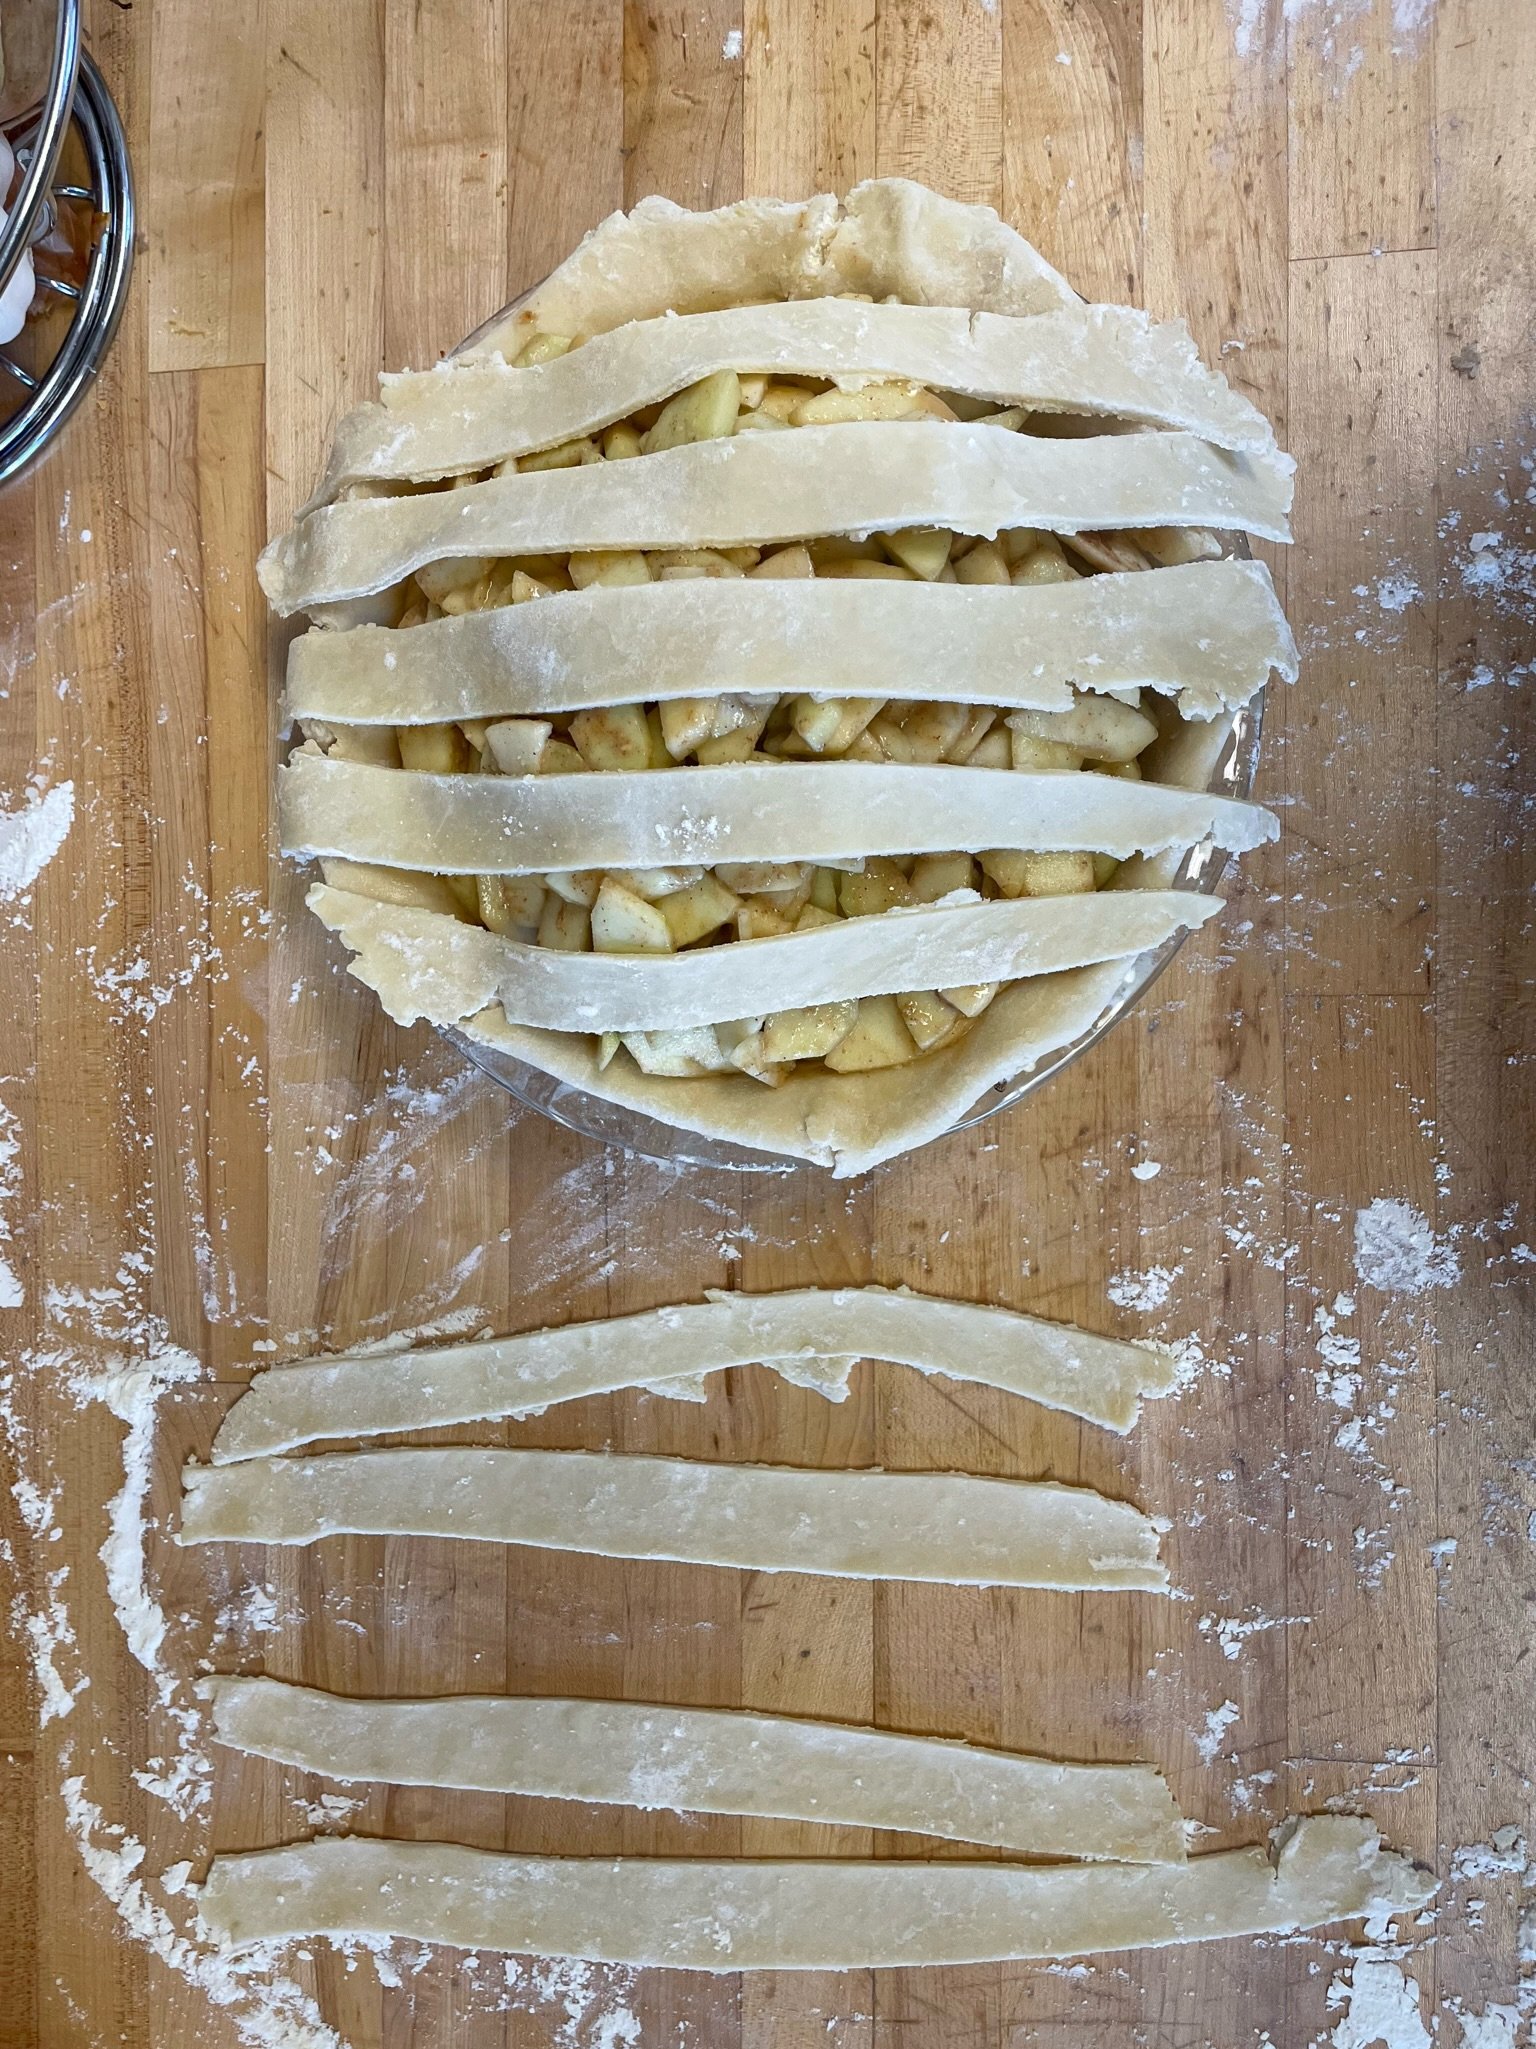
1. Scoop apples into the crust, mounding them high into the center. Pour any juices that have accumulated in the mixing bowl over top.
2. If you made a crumble topping, sprinkle it evenly over the top. To help it stay in place, you can press and pack it lightly into a mound; my youngest cousin loves to help with this step and compares it to building a sandcastle.
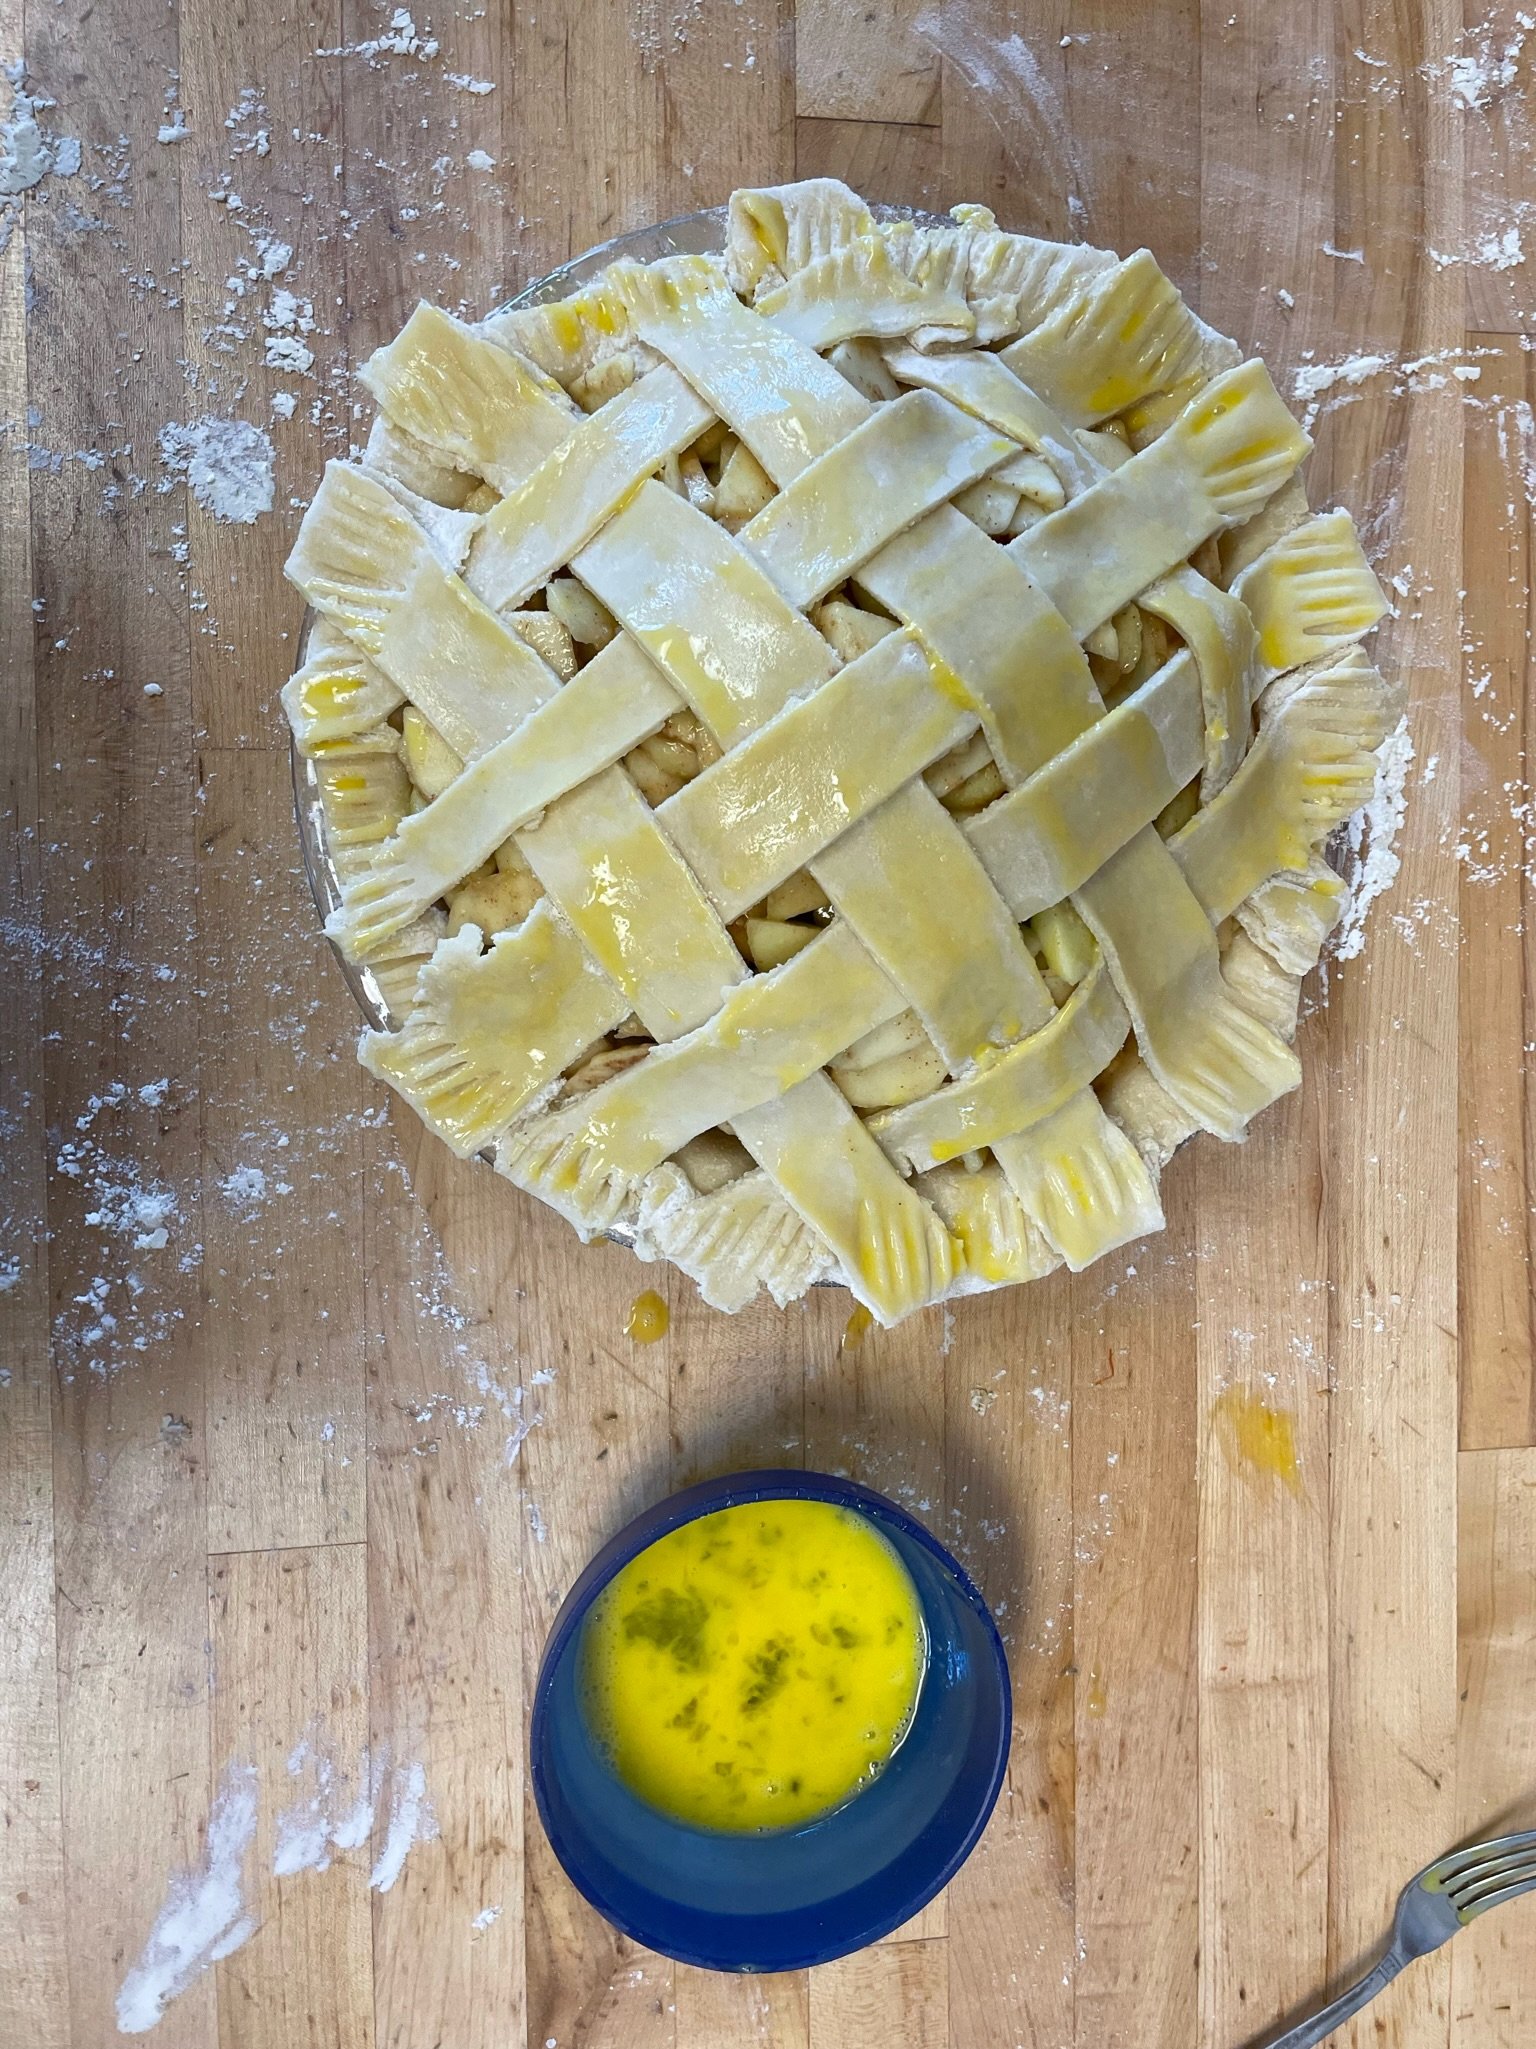
If you made a second crust for a lattice, evenly space five strips parallel to each other overtop the apples, using the longest strip for the middle of the pie and so on. Fold back strips 1, 3, and 5, and take the shortest of the remaining strips and lay it perpendicular across strips 2 and 4. Fold 1, 3, and 5 back over. For the next strip, fold back strips 2 and 4 and lay it overtop strips 1, 3, and 5. Repeat until your lattice is finished! Trim excess dough from the strips or fold under, then press down again with the tines of a fork. Beat an egg and brush the top so your lattice top will bake to a gorgeous golden brown.
3. Cover pie loosely with a sheet of plastic wrap and let chill again in the fridge while you preheat the oven to 400 F.

Bake the Pie:
1. Place uncovered, chilled pie on a large rimmed baking sheet. This will (1) help the bottom crust from burning or browning too fast and (2) prevent any juices that spill over from hitting your oven floor and causing smokey ashy mess!
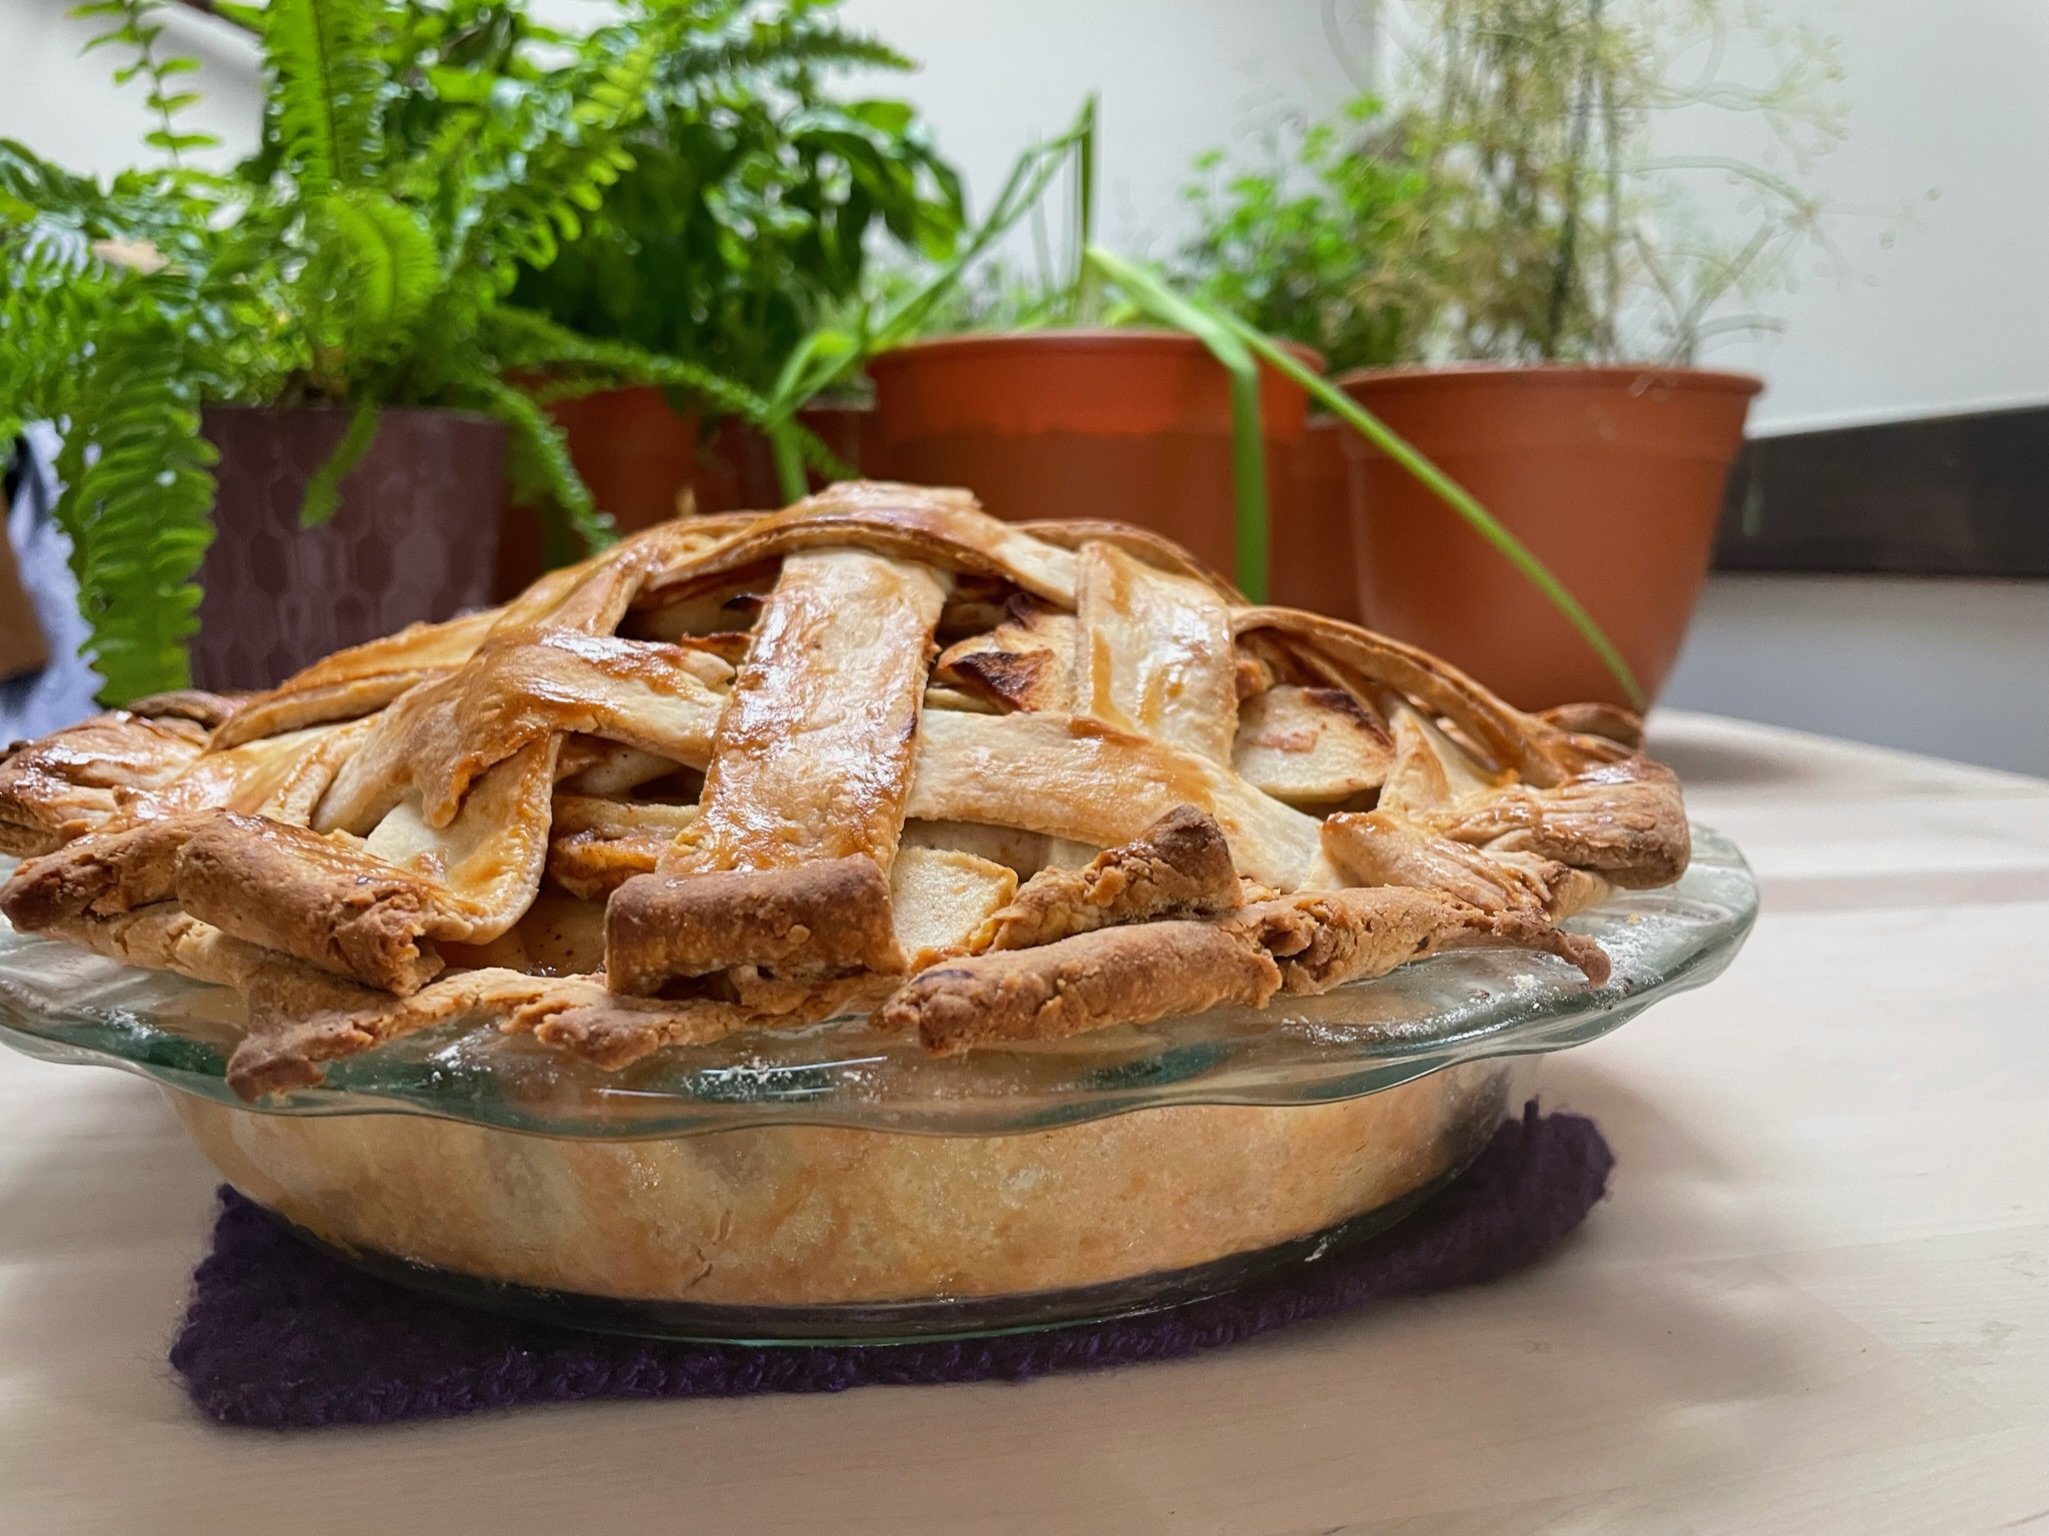
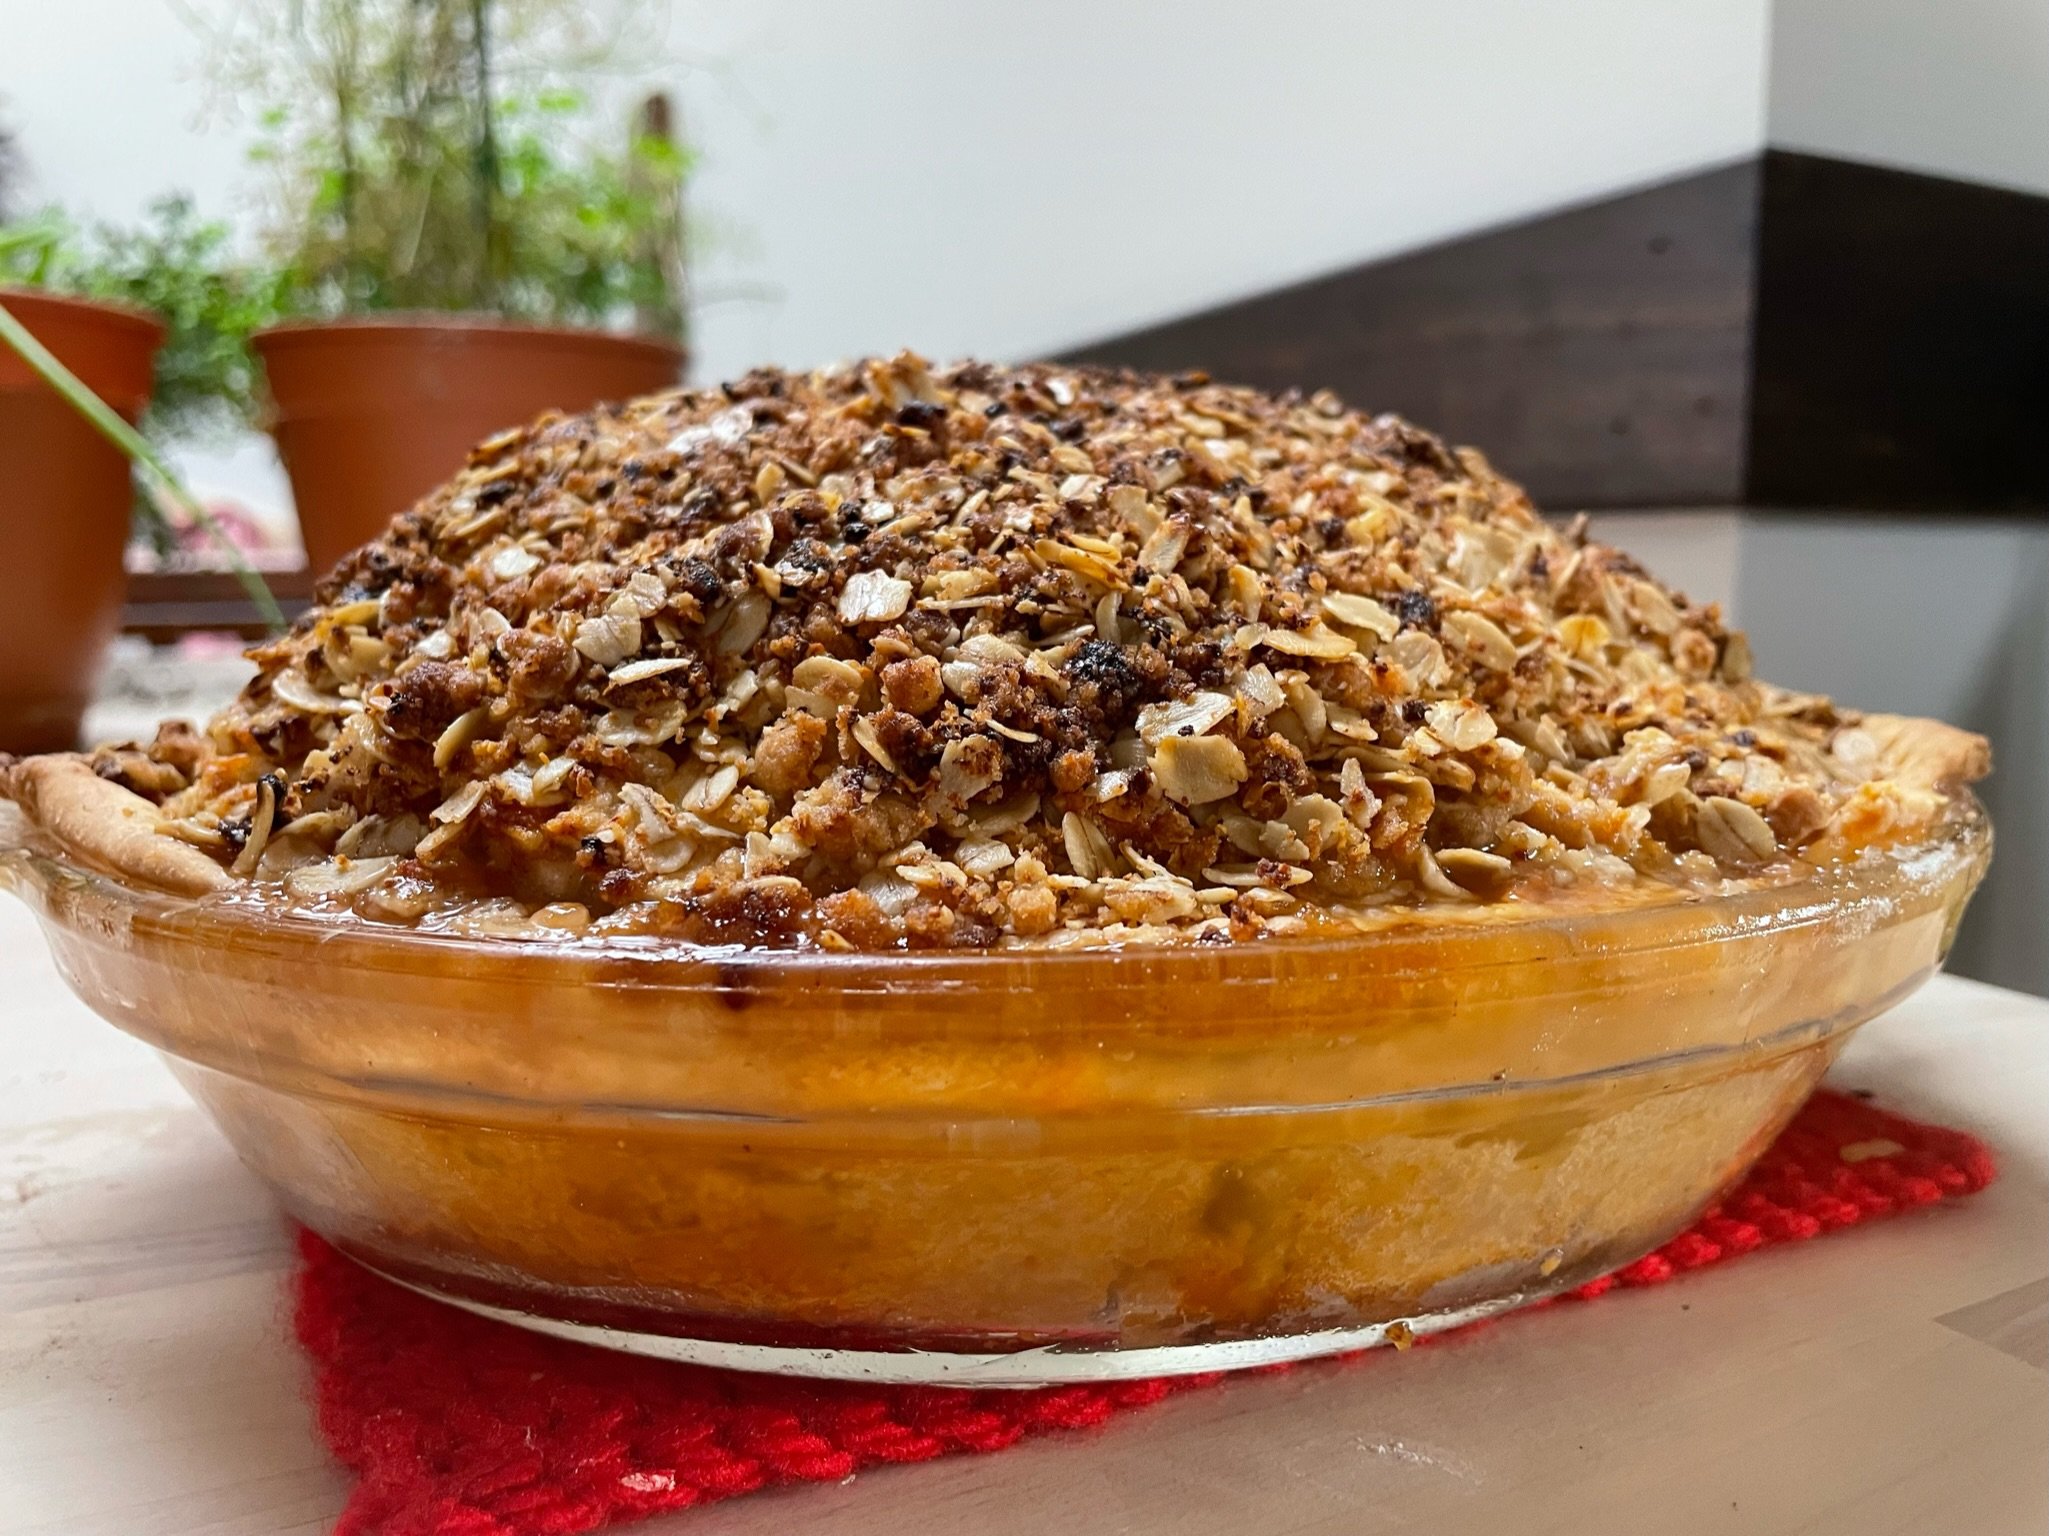
2. Bake pie at 400 F for around 75 minutes, rotating once or twice for even color. Watch your pie closely; if the top is browning too quickly, you can cover it with a tented sheet of foil. Pie is done when steam is rising, juices are bubbling and peeking through the crumble or lattice top, crust is golden brown, and your kitchen smells like a bakery. (You can also test the internal temperature, it should hit 195 F.)
Serve the Pie: Let pie cool for at least an hour before slicing. Serve with cold whipped cream, vanilla ice cream, or more cheese alongside! Leftovers, if you have them, keep at room temperature for a few days or in the fridge for 1 week.
NOTES
• Everything I know about pie comes from two sources—Deb Perelman’s fabulous blog “Smitten Kitchen” and Kate McDermott’s incredible book Art of the Pie. I highly recommend either or both of these sources for more tips and wisdom on pie-making, especially when it comes to best practices for mixing and rolling a pie crust. Deb has a wonderful post called “Latticed and Loony” that I still pull up nearly every time I make a lattice top pie!
• On apples: I tested this recipe with a mix of Granny Smiths (from the grocery store), SweeTangos (from the Park Ridge farmer’s market!), and Macouns (from my winter CSA from Nichols Farm!). There are many schools of thought on what the best pie apples are; I say use whatever is fresh and available and tastes good to you! Taste-test your filling and adjust sugar, spices, and lemon juice as needed.
• On Chandoka vs Great Grand Cheddar: I tested the lattice top pie with Chandoka and the crumble top pie with Great Grand. The general consensus from my Friendsgiving pals who taste-tested this recipe with me was that the Chandoka was a bit milder and sweeter (though with a surprising savory edge in the lattice crust) but the Great Grand provided a more satisfying and true cheddar flavor. For what it’s worth, my personal favorite was the crumble top pie made with Great Grand, and I especially liked it the next morning with coffee.
• If time and ease is paramount, you can make this pie with a store-bought crust—I’d suggest using a crumble top and doubling the amount of cheese in it to maximize flavor!
• Lastly, I’ve been the Pie Maker for my family’s Thanksgiving for the past four years—but I’m sure many folks reading this recipe have much more pie wisdom and experience than I. Use what you know, and thank you for bearing with the words of a relative beginner!